The Ultimate No-Bake Strawberry Crunch Cheesecake Recipe
Estimated reading time: 7-9 minutes | Prep time: 25 minutes | Total time: 8 hours 30 minutes (includes chilling)
Key Takeaways
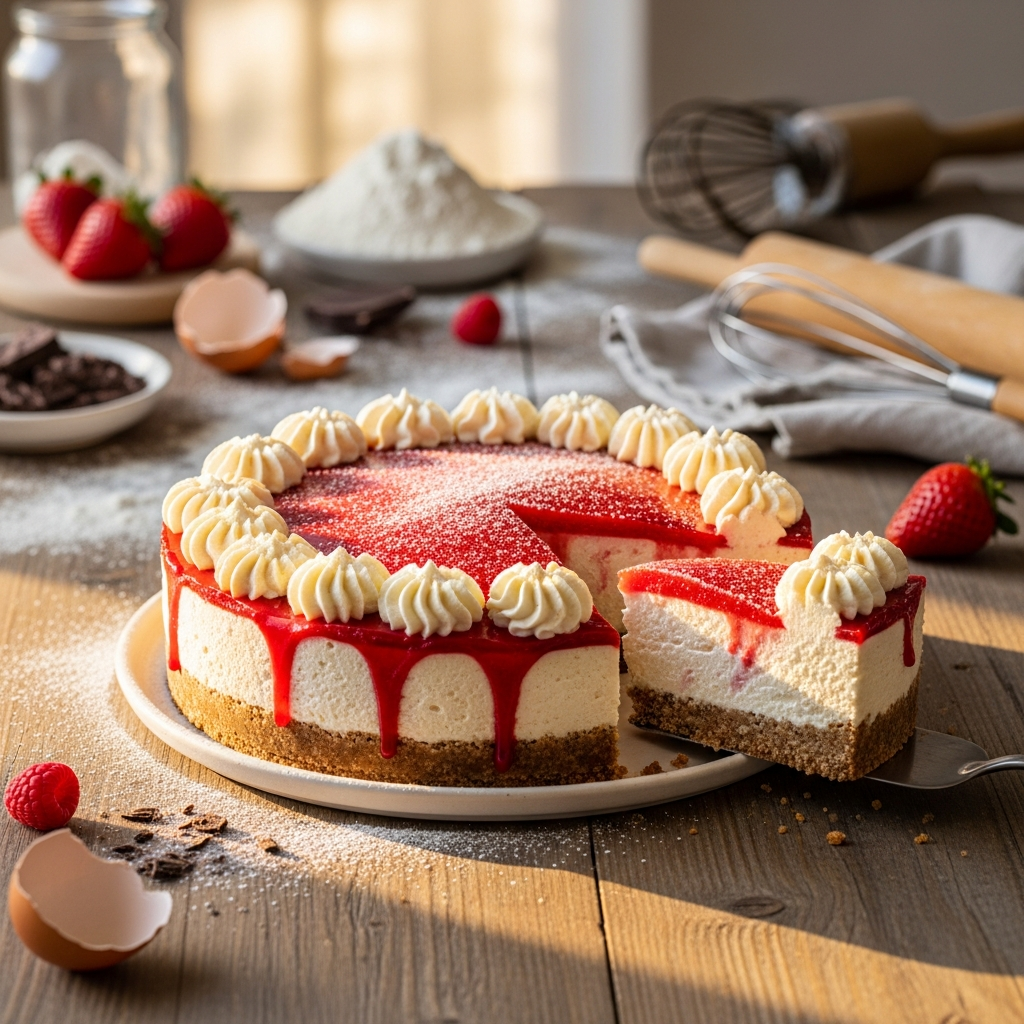
- Unforgettable Texture: Experience three layers of perfection—a buttery graham cracker crust, a rich and creamy no-bake cheesecake filling, and a crispy, vibrant strawberry crunch topping.
- Beginner-Friendly & No-Oven Required: This is a simple recipe that anyone can master. Since it’s a no-bake dessert, it’s perfect for warm weather or for freeing up oven space.
- Perfect for Making Ahead: This cheesecake needs to chill for at least 8 hours, making it an ideal make-ahead dessert for parties, holidays, and special occasions.
- Versatile Serving Options: Serve this stunning cheesecake on its own, or elevate it with fresh whipped cream and sliced strawberries for a show-stopping presentation.
Table of Contents
Why You’ll Love This No-Bake Strawberry Crunch Cheesecake Recipe
Get ready to discover your new favorite dessert: the ultimate No-Bake Strawberry Crunch Cheesecake. This recipe is a game-changer, combining the nostalgic flavors of a strawberry crunch ice cream bar with the rich, decadent texture of a creamy homemade cheesecake. It’s an easy dessert that delivers a “wow” factor without ever needing to turn on your oven, making it a perfect treat for any season.
What makes this cheesecake truly special is its incredible combination of textures. You start with a classic, buttery graham cracker crust that provides the perfect sturdy base. Next comes the star of the show: a velvety smooth, tangy cream cheese filling that’s light, airy, and melts in your mouth. The final touch is a generous layer of homemade strawberry crunch topping, made from vanilla cookies and intensely flavorful freeze-dried strawberries. This topping provides a delightful crispiness and a burst of sweet strawberry flavor that perfectly complements the creamy filling. This family-friendly dessert is perfect for summer barbecues, birthday parties, or whenever you need a simple recipe that looks and tastes like it came from a gourmet bakery.
Ingredients You’ll Need
Using high-quality, full-fat ingredients is the key to achieving the perfect texture for this No-Bake Strawberry Crunch Cheesecake. Here’s exactly what you’ll need to gather.
For the Strawberry Crunch Topping:
- 1 cup (110g) vanilla sandwich cookies (like Golden Oreos), finely crushed
- 1/2 cup (15g) freeze-dried strawberries, crushed into a coarse powder
- 4 tablespoons (57g) unsalted butter, melted
For the Graham Cracker Crust:
- 2 cups (240g) graham cracker crumbs
- 1/4 cup (50g) granulated sugar
- 1/2 cup (113g) unsalted butter, melted
For the No-Bake Cheesecake Filling:
- 16 oz (452g) full-fat block cream cheese, softened to room temperature
- 1 cup (120g) confectioners’ (powdered) sugar
- 1 1/2 cups (360ml) heavy whipping cream, very cold
- 2 teaspoons pure vanilla extract
- 1 tablespoon fresh lemon juice
Step-by-Step Instructions
Follow these simple steps to create a flawless no-bake cheesecake from scratch. A food processor is helpful for crushing the cookies and crackers, but a Ziploc bag and rolling pin work just as well.
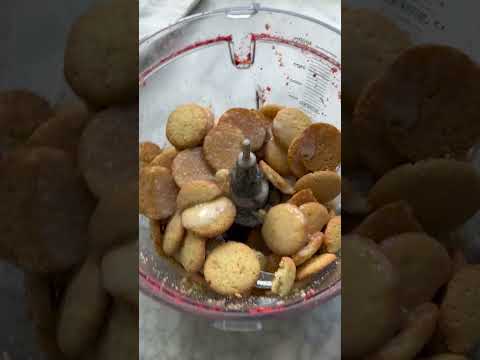
- Step 1: Prepare the Strawberry Crunch Topping. First, in a small bowl, combine the crushed vanilla sandwich cookies and the crushed freeze-dried strawberries. Pour the melted butter over the mixture. Next, stir with a fork until everything is evenly moistened and resembles coarse, clumpy sand. Set this mixture aside to use later.
- Step 2: Make the Crust. In a medium bowl, mix the graham cracker crumbs and granulated sugar together. Subsequently, pour in the melted butter and stir until all the crumbs are damp. Firmly press this mixture into the bottom and slightly up the sides of a 9-inch (23cm) springform pan. Use the flat bottom of a glass or measuring cup to pack it tightly for a solid base. Place the crust in the refrigerator to chill while you prepare the filling.
- Step 3: Beat the Cream Cheese. In a large mixing bowl, place the softened cream cheese. Using an electric hand mixer or a stand mixer with the paddle attachment, beat on medium speed for 2-3 minutes until it is completely smooth and free of lumps. It is very important to start with room temperature cream cheese to avoid a lumpy filling.
- Step 4: Add Sugar and Flavorings. Scrape down the sides and bottom of the bowl with a rubber spatula. Then, add the confectioners’ sugar, vanilla extract, and fresh lemon juice to the cream cheese. Beat again on low speed until the sugar is just incorporated, then increase to medium speed and beat for another minute until the mixture is smooth and creamy.
- Step 5: Whip the Heavy Cream. In a separate, chilled medium bowl, pour in the very cold heavy whipping cream. Using clean beaters, whip the cream on high speed for 2-4 minutes, or until stiff peaks form. Stiff peaks mean the cream will hold its shape when the beaters are lifted. Be careful not to over-whip, as it can quickly turn into butter.
- Step 6: Fold the Mixtures Together. Gently add about one-third of the whipped cream into the cream cheese mixture. Carefully fold it in with a rubber spatula to lighten the base. Then, add the remaining whipped cream and continue to fold gently until just combined and no white streaks remain. Avoid stirring or overmixing, as this will deflate the whipped cream and result in a less stable cheesecake.
- Step 7: Assemble the Cheesecake. Remove the chilled crust from the refrigerator. Carefully spoon the cheesecake filling onto the crust. Use an offset spatula or the back of a spoon to spread it into an even, smooth layer.
- Step 8: Add the Topping. Generously and evenly sprinkle the prepared strawberry crunch topping over the entire surface of the cheesecake. Lightly press the crunch topping into the filling with your hands to help it adhere.
- Step 9: Chill Until Firm. Cover the springform pan loosely with plastic wrap or foil. For the best results, refrigerate the cheesecake for at least 8 hours, or preferably overnight. This long chilling time is crucial for the cheesecake to set properly and become firm enough to slice cleanly. Do not freeze it to speed up the process.
- Step 10: Serve. Once fully chilled and firm, run a thin, sharp knife around the outer edge of the cheesecake before releasing the springform collar. Slice with a large, sharp knife, cleaning the blade between each cut for perfect slices. Serve immediately.
Baking Tips, Variations & Substitutions
Pro Tips for the Perfect No-Bake Strawberry Crunch Cheesecake
- Room Temperature is Key: For a perfectly smooth, lump-free cheesecake filling, your block cream cheese MUST be softened to room temperature. Take it out of the fridge at least 1-2 hours before you begin.
- Use Full-Fat Ingredients: This is not the place for low-fat substitutes! No-bake cheesecakes rely on the fat content in the cream cheese and heavy cream to set properly. Therefore, use full-fat block cream cheese (not the spreadable kind in a tub) and heavy whipping cream (at least 36% fat) for the best texture and stability.
- Freeze-Dried Strawberries are a Must: Do not substitute fresh or frozen strawberries in the crunch topping. They contain too much moisture and will make the topping soggy and spoil the texture. Freeze-dried strawberries provide intense flavor and color while keeping the crunch crispy.
- Don’t Rush the Chill Time: Patience is essential. The cheesecake needs the full 8+ hours in the refrigerator to set completely. Rushing this step will result in a soft, messy cheesecake that is difficult to slice. Overnight is always best.
Easy Variations You Can Try
- Gluten-Free Version: To make this recipe gluten-free, simply substitute the graham crackers and vanilla sandwich cookies with your favorite certified gluten-free alternatives. The results will be just as delicious.
- Lemon Lover’s Twist: Add the finely grated zest of one lemon to the cream cheese filling along with the lemon juice to enhance the bright, tangy flavor.
- Different Crust: Feel free to swap the graham cracker crust with a crust made from crushed Biscoff cookies, shortbread, or even chocolate wafer cookies for a different flavor profile.
- Add a Jam Layer: For an extra layer of fruit flavor, spread a thin layer of your favorite strawberry jam over the crust before adding the cheesecake filling.
How to Serve & Store Your No-Bake Strawberry Crunch Cheesecake
Serve this cheesecake chilled, directly from the refrigerator. It pairs wonderfully with a dollop of fresh whipped cream or a few sliced fresh strawberries to complement the crunch topping. To store, cover the cheesecake tightly with plastic wrap or place it in an airtight container. It will keep well in the refrigerator for up to 5 days. For longer storage, you can freeze individual slices. Place the slices on a baking sheet to flash-freeze for one hour, then wrap each slice tightly in plastic wrap and then foil. Store in the freezer for up to 1 month. Thaw slices in the refrigerator for a few hours before enjoying. If you love this easy dessert, try our famous No-Bake Biscoff Cheesecake next!
Watch: How to Make It
Frequently Asked Questions
Why didn’t my no-bake cheesecake set properly?
The most common reasons are not chilling it long enough, or using low-fat ingredients. Ensure you use full-fat block cream cheese and cold heavy whipping cream whipped to stiff peaks. Finally, the No-Bake Strawberry Crunch Cheesecake absolutely must chill for a minimum of 8 hours to become firm enough to slice.
Can I freeze the whole cheesecake?
Yes, you can. After it has fully set in the refrigerator, wrap the entire cheesecake (in its pan base) tightly in plastic wrap and then a layer of aluminum foil. It can be frozen for up to 2 months. Thaw it overnight in the refrigerator before serving. Note that the crunch topping may soften slightly upon thawing.
Can I reduce the sugar in this recipe?
You can slightly reduce the confectioners’ sugar in the filling by about 1/4 cup (30g) without drastically affecting the final texture. However, sugar contributes to the stability and texture of a no-bake cheesecake, so reducing it too much may result in a softer set.
How can I make this recipe gluten-free?
Absolutely. To make this recipe gluten-free, simply substitute the graham crackers and vanilla sandwich cookies with your favorite gluten-free alternatives. Most grocery stores carry gluten-free graham-style crackers and vanilla sandwich cookies that work perfectly in this recipe.