
The Ultimate Caramel Apple Crisp Cheesecake: A Perfect Fall Dessert
Estimated reading time: 8-10 minutes | Prep time: 45 minutes | Total time: 10 hours (includes chilling)
Key Takeaways
- Three Desserts in One: This recipe masterfully combines a creamy cheesecake, sweet and tangy spiced apples, and a crunchy oat crisp topping for an unforgettable texture and flavor experience.
- Perfect for Any Occasion: While it’s an ideal fall dessert for holidays like Thanksgiving, this showstopper is perfect for any special gathering where you want to impress.
- Make-Ahead Friendly: Cheesecake requires chilling, making this the perfect make-ahead dessert. Prepare it a day or two in advance to reduce stress.
- Foolproof Tips Included: With detailed instructions for a water bath and slow cooling, you’ll learn how to achieve a perfectly smooth, crack-free cheesecake every time.
Table of Contents
Why You’ll Love This Caramel Apple Crisp Cheesecake Recipe
Welcome to what might just be the most decadent, delicious, and deeply satisfying dessert you’ll make all year. This homemade Caramel Apple Crisp Cheesecake is the ultimate fusion of three beloved classics: the rich creaminess of a New York-style cheesecake, the warm, spiced comfort of a homemade apple crisp, and the irresistible sweetness of salted caramel. Each layer is crafted to perfection, creating a symphony of textures and flavors in every single bite. From the buttery graham cracker crust to the tender spiced apples, the velvety cheesecake filling, the crunchy oat topping, and the final drizzle of liquid gold caramel, this is more than just a recipe—it’s an event.
Whether you’re looking for a show-stopping dessert for a holiday gathering or simply want to treat your family to an incredible homemade sweet, this simple recipe delivers. We’ve broken down every step to ensure you can achieve a flawless result, even if you’re new to making cheesecake from scratch. This family-friendly dessert is guaranteed to become a new fall tradition. Let’s gather our ingredients and bake something truly special.
Ingredients You’ll Need
Using high-quality, room-temperature ingredients is the first step to achieving the perfect Caramel Apple Crisp Cheesecake. Here’s everything you’ll need, broken down by layer:
- For the Graham Cracker Crust:
- 1 1/2 cups (180g) graham cracker crumbs
- 1/4 cup (55g) packed light brown sugar
- 1/2 teaspoon ground cinnamon
- 6 tablespoons (85g) unsalted butter, melted
- For the Spiced Apple Layer:
- 2 medium firm, tart apples (like Granny Smith or Honeycrisp), peeled, cored, and diced
- 2 tablespoons (28g) unsalted butter
- 1/4 cup (55g) packed light brown sugar
- 1 teaspoon ground cinnamon
- 1/4 teaspoon ground nutmeg
- 1 tablespoon cornstarch
- 1 tablespoon lemon juice
- For the Cheesecake Filling:
- 32 oz (904g) full-fat block cream cheese, softened to room temperature
- 1 1/2 cups (300g) granulated sugar
- 4 large eggs, at room temperature
- 1 cup (240g) sour cream, at room temperature
- 2 teaspoons pure vanilla extract
- 1/4 teaspoon salt
- For the Oat Crisp Topping:
- 1/2 cup (60g) all-purpose flour
- 1/2 cup (45g) old-fashioned rolled oats
- 1/2 cup (110g) packed light brown sugar
- 1/2 teaspoon ground cinnamon
- 1/4 cup (57g) cold unsalted butter, cut into small cubes
- For the Salted Caramel Drizzle:
- 1 cup (200g) granulated sugar
- 1/4 cup (60ml) water
- 1/2 cup (120ml) heavy cream, warmed
- 4 tablespoons (57g) unsalted butter, cut into pieces
- 1 teaspoon flaky sea salt
Step-by-Step Instructions
Follow these detailed steps to create your masterpiece. Remember, patience is key, especially during the cooling process!
- Step 1: Prepare the Pan and Crust. First, preheat your oven to 350°F (175°C). Next, wrap the outside of your 9-inch springform pan with a double layer of heavy-duty aluminum foil, ensuring it is watertight. This step is crucial if using a water bath. Then, in a medium bowl, combine the graham cracker crumbs, 1/4 cup brown sugar, and 1/2 teaspoon cinnamon. Pour in the melted butter and mix until the crumbs are evenly moistened. Firmly press this mixture into the bottom and slightly up the sides of the prepared pan. Finally, bake for 10 minutes. Let it cool on a wire rack while you prepare the fillings.
- Step 2: Cook the Spiced Apples. While the crust cools, prepare the apple layer. In a medium saucepan over medium heat, melt 2 tablespoons of butter. Add the diced apples, 1/4 cup brown sugar, 1 teaspoon cinnamon, and nutmeg. Cook for 5-7 minutes, stirring occasionally, until the apples have softened slightly. In a small bowl, whisk the cornstarch with the lemon juice until smooth, then stir it into the apple mixture. Continue cooking for 1 more minute until the sauce has thickened. After that, remove from heat and set aside to cool completely.
- Step 3: Make the Cheesecake Filling. In the bowl of a stand mixer fitted with the paddle attachment, beat the softened cream cheese on medium-low speed until completely smooth and creamy, scraping down the sides of the bowl as needed to prevent lumps. Next, with the mixer still on low, gradually add the granulated sugar and salt, mixing until just combined. Add the eggs one at a time, mixing on low speed and waiting until each egg is incorporated before adding the next. Be careful not to overmix here. Finally, mix in the sour cream and vanilla extract until the batter is smooth and uniform.
- Step 4: Layer the Cheesecake. Pour about half of the cheesecake batter over the cooled crust and spread it into an even layer. Then, carefully spoon the cooled spiced apple mixture evenly over the batter, leaving a small border around the edge. Gently pour the remaining cheesecake batter over the apples and spread it smoothly to the edges of the pan, fully covering the apple layer.
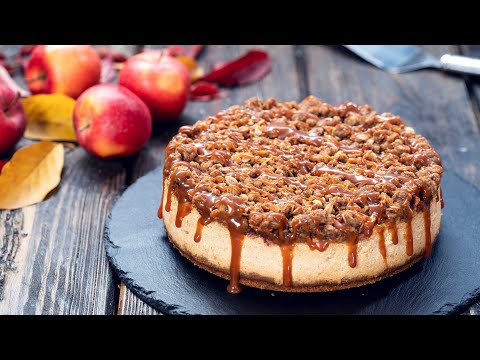
- Step 5: Make and Add the Crisp Topping. In a separate bowl, whisk together the flour, rolled oats, 1/2 cup brown sugar, and 1/2 teaspoon cinnamon. Add the cold, cubed butter. Using your fingertips or a pastry blender, cut the butter into the dry ingredients until the mixture resembles coarse, pea-sized crumbs. Sprinkle this delicious crisp topping evenly over the entire surface of the cheesecake batter.
- Step 6: Bake in a Water Bath. Place the foil-wrapped springform pan inside a large roasting pan. Carefully pour boiling water into the roasting pan until it comes about halfway up the sides of the springform pan. Bake for 60-75 minutes. The cheesecake is done when the edges are set and the center has a slight, consistent jiggle (not a watery wobble).
- Step 7: Cool the Cheesecake Slowly. This is the secret to a crack-free cheesecake! Turn off the oven and prop the oven door open slightly with a wooden spoon. Let the cheesecake cool in the warm oven for 1 hour. Afterward, carefully remove the cheesecake from the water bath and the roasting pan. Let it cool completely on a wire rack at room temperature. Once cool, cover with plastic wrap and refrigerate for at least 6 hours, or preferably overnight, to allow it to set fully.
- Step 8: Prepare the Salted Caramel Sauce. For the sauce, combine 1 cup of sugar and the water in a medium, heavy-bottomed saucepan. Cook over medium-high heat, swirling the pan occasionally but not stirring, until the sugar dissolves and turns a deep amber color. Immediately remove from heat and carefully whisk in the warm heavy cream; the mixture will bubble vigorously. Next, whisk in the butter until the sauce is smooth, followed by the flaky sea salt. Let the caramel cool slightly before using.
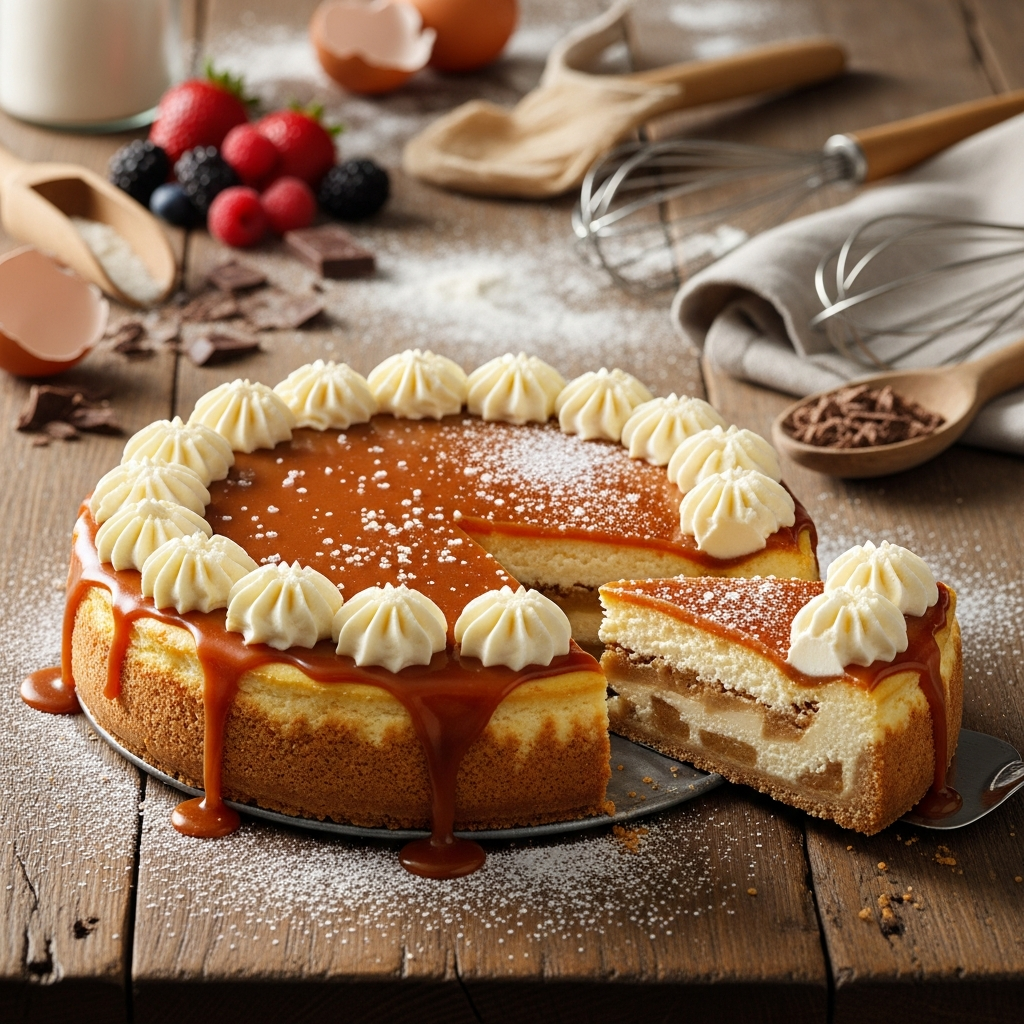
- Step 9: Serve. Once the cheesecake is fully chilled, carefully run a thin knife around the edge before releasing the springform pan ring. Drizzle the salted caramel sauce generously over the top before slicing and serving. You can serve extra caramel on the side for those who want more. Enjoy your incredible homemade dessert!
Baking Tips, Variations & Substitutions
Pro Tips for a Perfect Caramel Apple Crisp Cheesecake
- Room Temperature is Key: For a flawlessly smooth and creamy cheesecake filling, ensure your cream cheese, eggs, and sour cream are all at room temperature. Cold ingredients can result in a lumpy batter that is difficult to combine properly and can lead to overmixing.
- Do Not Overmix: When you add the eggs, mix on low speed and only until they are just incorporated. Overmixing whips too much air into the batter, which causes the cheesecake to rise rapidly in the oven and then crack dramatically as it cools.
- Embrace the Water Bath: A water bath (bain-marie) creates a steamy, humid environment in the oven. This promotes even, gentle baking and is the single best way to prevent cracks and ensure a creamy, dense texture. Don’t skip the foil wrapping step!
- Patience During Cooling: The slow cooling process is just as important as the baking. Cooling the cheesecake in the turned-off oven, then on the counter, and finally in the fridge prevents drastic temperature changes that lead to cracks. A perfect cheesecake cannot be rushed.
Easy Variations You Can Try
- Nutty Crisp Topping: Add 1/2 cup of chopped pecans or walnuts to the oat crisp topping mixture for extra crunch and a nutty flavor that pairs beautifully with the apples and caramel.
- Spiced-Up Crust: Add a pinch of ground ginger or allspice to the graham cracker crust mixture for a warmer, more complex flavor profile.
- Bourbon Caramel Sauce: For an adult twist, carefully stir 1-2 tablespoons of your favorite bourbon into the salted caramel sauce after you’ve mixed in the butter and salt.
- Gluten-Free Adaptation: This recipe is easily adapted to be gluten-free. For the crust, use your favorite gluten-free graham-style crackers. For the crisp topping, substitute the all-purpose flour with a 1-to-1 gluten-free baking flour blend that contains xanthan gum.
How to Serve & Store Your Caramel Apple Crisp Cheesecake
This cheesecake is best served chilled, with a generous drizzle of warm salted caramel sauce. For an even more decadent treat, add a scoop of vanilla bean ice cream or a dollop of fresh whipped cream. To store, cover the cheesecake tightly with plastic wrap or place it in an airtight container. It will keep well in the refrigerator for up to 5 days, although the crisp topping will soften over time. You can also freeze individual slices or the whole cheesecake. Wrap it securely in plastic wrap and then a layer of aluminum foil. It can be frozen for up to 3 months. Thaw frozen cheesecake overnight in the refrigerator before serving. For more caramel goodness, check out our recipe for Homemade Salted Caramel Sauce.
Watch: How to Make It

Frequently Asked Questions
Why did my cheesecake crack?
Cracks are the most common cheesecake issue! They are typically caused by one of three things: overmixing the batter (especially after adding eggs), a drastic change in temperature after baking, or the cheesecake sticking to the sides of the pan as it settles. Using a water bath and following the slow cooling instructions are the best ways to prevent this from happening.
Can I make this Caramel Apple Crisp Cheesecake ahead of time?
Absolutely! This is the perfect make-ahead dessert. You can bake it up to two days in advance. Keep it covered in the refrigerator and prepare the salted caramel sauce just before serving for the best results.
Can I freeze this cheesecake?
Yes, this cheesecake freezes beautifully. Once it has chilled completely, you can freeze it whole or in individual slices. Wrap it tightly in two layers of plastic wrap followed by a layer of aluminum foil to prevent freezer burn. It will last for up to 3 months. To serve, thaw it overnight in the refrigerator.
What are the best apples to use?
For the apple layer, you want a firm apple that will hold its shape during cooking and has a nice balance of sweet and tart. Granny Smith, Honeycrisp, Braeburn, and Pink Lady are all excellent choices for this recipe.
Can I reduce the sugar in this recipe?
You can slightly reduce the sugar in the cheesecake filling and apple layer by about 1/4 cup (50g) without drastically altering the final product, though the texture may be slightly less tender. However, do not reduce the sugar in the salted caramel sauce, as it is essential for the chemical reaction needed to create caramel.