
The Ultimate No-Bake Strawberry Cheesecake: Creamy, Dreamy & So Easy!
Estimated reading time: 7-9 minutes | Prep time: 30 minutes | Total time: 6.5+ hours (including chilling)
Key Takeaways
- Unbelievably Creamy Texture: This recipe delivers a silky-smooth, rich, and tangy cheesecake filling without a single lump, thanks to room-temperature cream cheese and freshly whipped cream.
- Beginner-Friendly & No-Bake: An incredibly simple recipe that requires no oven, making it the perfect family-friendly dessert for hot summer days or stress-free entertaining.
- Make-Ahead & Freezer-Friendly: This cheesecake is an ideal make-ahead dessert. It needs to chill overnight and freezes beautifully, so you can always have a stunning homemade treat ready to go.
- Perfect for Any Occasion: Serve this gorgeous cheesecake at potlucks, BBQs, or family gatherings. It pairs wonderfully with a cup of coffee or as a standalone showstopper.
Table of Contents
Why You’ll Love This No-Bake Strawberry Cheesecake Recipe
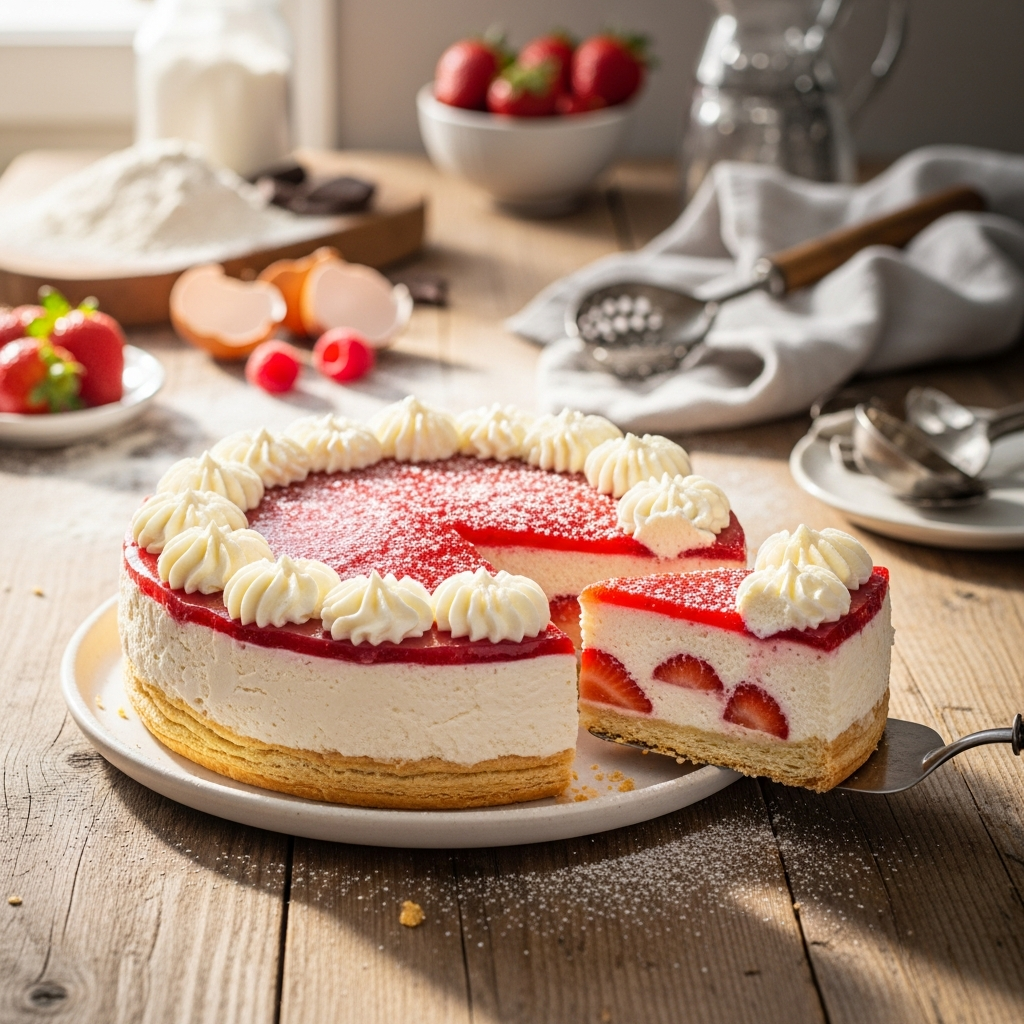
Welcome to the only no-bake strawberry cheesecake recipe you will ever need! If you’re searching for a dessert that is both stunningly beautiful and incredibly simple to make, you’ve found it. This recipe is all about creating a luxuriously creamy, light, and airy cheesecake filling, bursting with fresh strawberry flavor, all nestled on top of a crisp, buttery biscuit crust. It’s the perfect homemade dessert that looks and tastes like it came from a high-end bakery, but is secretly one of the easiest recipes you can make from scratch.
The magic of this dessert lies in its simplicity and texture. Because it’s a no-bake recipe, you don’t have to worry about turning on the oven, which makes it an absolute lifesaver during warmer months. There’s no need for complicated water baths or worrying about cracks forming on the surface. Instead, the refrigerator does all the work, firming the rich cream cheese filling into the perfect sliceable consistency. The result is a cheesecake with a melt-in-your-mouth texture that is both refreshing and indulgent.
Whether you’re planning a dessert for a special occasion, a summer BBQ, or simply craving a sweet, family-friendly treat, this no-bake strawberry cheesecake is guaranteed to impress. It’s a crowd-pleaser that combines classic flavors in a fresh and modern way, delivering that perfect balance of sweet, tangy, and fruity in every single bite.
Ingredients & Equipment You’ll Need
Using high-quality, full-fat ingredients is the key to achieving the perfect texture for this no-bake strawberry cheesecake. Here is everything you’ll need:
For the Buttery Biscuit Crust
- 2 cups (200g) digestive biscuit or graham cracker crumbs
- 1/2 cup (113g) unsalted butter, melted
- 2 tablespoons (25g) granulated sugar
For the Creamy Strawberry Filling
- 16 oz (450g) full-fat block cream cheese, softened to room temperature
- 1 1/4 cups (150g) powdered sugar (icing sugar)
- 1 1/2 cups (360ml) cold heavy whipping cream
- 1 teaspoon vanilla extract
- 1 tablespoon fresh lemon juice
- 1 cup (225g) fresh strawberry puree (from about 1 pint/450g of strawberries)
For the Fresh Topping
- 1 cup (150g) fresh strawberries, washed, hulled, and sliced
Essential Equipment
- 9-inch (23 cm) round springform pan
- Large mixing bowl
- Medium mixing bowl
- Electric hand mixer or stand mixer with whisk and paddle attachments
- Rubber spatula
- Food processor or blender (for making crumbs and puree)
- Measuring cups and spoons
- Offset spatula or the back of a spoon
Step-by-Step Instructions
Follow these simple steps to create a flawless homemade cheesecake from scratch.
Part 1: Preparing the Crust
- Step 1: Make the Crumbs. Place the digestive biscuits or graham crackers into a food processor and pulse until they form fine, even crumbs. Alternatively, place them in a zip-top bag and crush them with a rolling pin.
- Step 2: Mix the Crust Ingredients. Transfer the crumbs to a medium bowl. Add the granulated sugar and melted butter. Mix with a fork until the crumbs are thoroughly moistened and have the texture of wet sand.
- Step 3: Form and Chill the Crust. Press the crumb mixture firmly into the bottom and slightly up the sides of a 9-inch springform pan. Use the flat bottom of a glass or measuring cup to pack it down tightly. Place the crust in the refrigerator to chill for at least 30 minutes while you prepare the filling.
Part 2: Creating the Creamy Filling
- Step 4: Make the Strawberry Puree. Wash and hull about one pint of fresh strawberries. Place them in a blender or food processor and blend until completely smooth. Measure out exactly 1 cup of puree for the filling and set it aside.
- Step 5: Whip the Heavy Cream. In a large, chilled mixing bowl, pour the cold heavy whipping cream. Using an electric mixer with the whisk attachment, beat on medium-high speed until stiff peaks form. Stiff peaks mean they hold their shape when you lift the beaters. Be careful not to over-whip. Set the whipped cream aside in the refrigerator.
- Step 6: Beat the Cream Cheese. In a separate large bowl, beat the softened cream cheese with an electric mixer on medium speed until it’s completely smooth and free of lumps. This is crucial for a silky texture.
- Step 7: Combine Filling Ingredients. Add the powdered sugar, vanilla extract, and lemon juice to the smooth cream cheese. Beat on low speed until just combined, then increase to medium and beat for one more minute until creamy. Scrape down the sides of the bowl to ensure everything is incorporated.
Part 3: Assembling and Chilling the Cheesecake
- Step 8: Fold in Puree and Whipped Cream. Pour the strawberry puree into the cream cheese mixture. Gently fold it in with a spatula until mostly combined, leaving some streaks for a marbled effect if desired. Retrieve the whipped cream from the fridge and gently fold it into the cheesecake mixture in two or three additions until no white streaks remain. Be gentle to keep the mixture light and airy.
- Step 9: Assemble the Cheesecake. Remove the chilled crust from the refrigerator. Spoon the strawberry cheesecake filling over the crust and spread it into an even layer using an offset spatula or the back of a spoon.
- Step 10: Chill Until Firm. Cover the springform pan with plastic wrap, ensuring it doesn’t touch the surface of the filling. Refrigerate for a minimum of 6 to 8 hours. For the best, firmest set, chilling overnight is highly recommended.
- Step 11: Decorate and Serve. Before serving, run a thin knife around the edge of the cheesecake to loosen it. Unclip and remove the side of the springform pan. Arrange the fresh sliced strawberries on top. Slice with a clean, sharp knife and enjoy!
Baking Tips, Variations & Substitutions
Pro Tips for the Perfect No-Bake Strawberry Cheesecake
- Room Temperature is Key: For a lump-free, silky smooth filling, your block cream cheese MUST be softened to room temperature. Cold cream cheese will result in a clumpy texture.
- Cold Cream Creates Volume: The heavy whipping cream must be very cold to whip into stable, stiff peaks. For best results, chill your mixing bowl and whisk attachment in the freezer for 10-15 minutes beforehand.
- Do Not Overmix: When folding in the whipped cream, be gentle. Overmixing will deflate the air, leading to a denser cheesecake that may not set as firmly.
- Patience is a Virtue: The 6-8 hour chilling time is non-negotiable. This allows the fats to solidify, which sets the cheesecake. Rushing this step will result in a soupy dessert.
- For an Extra Smooth Puree: If you prefer no seeds, strain the strawberry puree through a fine-mesh sieve before adding it to the cream cheese mixture for an extra touch of elegance.
Easy Variations You Can Try
- Different Crusts: Swap the digestive biscuits for Oreo cookies (remove the cream filling), Biscoff cookies, or shortbread for a different flavor profile.
- White Chocolate Strawberry: Melt 4 oz (113g) of good quality white chocolate and let it cool slightly. Beat the melted chocolate into the cream cheese mixture before adding the puree for an even richer flavor.
- Other Fruit Purees: This recipe works wonderfully with other fruit purees. Try using raspberry, mango, or passion fruit for a different twist.
How to Serve & Store Your No-Bake Strawberry Cheesecake
This no-bake cheesecake should always be served chilled, directly from the refrigerator, for the best texture and flavor. It’s a showstopper for summer BBQs, family gatherings, or even a simple weeknight treat. It pairs wonderfully with an extra dollop of whipped cream, a drizzle of chocolate sauce, or a sprig of fresh mint.
To store leftovers, cover the cheesecake tightly with plastic wrap or place it in an airtight container. It will keep well in the refrigerator for up to 4 days, although the crust may soften slightly over time. For longer storage, this dessert freezes exceptionally well. First, freeze it uncovered for 1 hour until firm. Then, wrap the whole cheesecake (or individual slices) tightly in plastic wrap, followed by a layer of aluminum foil. It can be frozen for up to 2 months. To serve, thaw overnight in the refrigerator. For more easy dessert ideas, why not try our moist banana bread recipe next?
Watch: How to Make It

Frequently Asked Questions
Can I freeze this No-Bake Strawberry Cheesecake?
Absolutely! This cheesecake freezes beautifully. For best results, freeze it without the fresh strawberry topping. Wrap it tightly in a layer of plastic wrap and then a layer of aluminum foil. It will last in the freezer for up to 2 months. Thaw it overnight in the refrigerator before decorating and serving.
Can I reduce the sugar in this recipe?
You can slightly reduce the powdered sugar by up to 1/4 cup (30g), but be aware that sugar contributes to the structure of a no-bake cheesecake. Reducing it too much may result in a softer set. Do not reduce the granulated sugar in the crust, as it is essential for binding the crumbs together.
Why didn’t my cheesecake set properly?
The most common reasons are not chilling it long enough (overnight is best), using low-fat cream cheese or light cream instead of their full-fat counterparts, or deflating the whipped cream by overmixing. Ensure you use full-fat dairy and respect the chilling time for a perfectly firm cheesecake.
Can I use frozen strawberries for the puree?
Yes, you can use frozen strawberries. However, you must thaw them completely and drain away all excess water and juice before blending. Adding extra liquid will introduce too much moisture and prevent the cheesecake from setting properly.