
The Ultimate No-Bake Strawberry Cheesecake: Creamy, Dreamy & So Easy!
Estimated reading time: 7–9 minutes | Prep time: 30 minutes | Total time: 8 hours 30 minutes (includes chilling)
Key Takeaways
- Incredibly Creamy Texture: This recipe delivers a perfectly smooth, rich, and airy mousse-like filling thanks to full-fat cream cheese and freshly whipped cream.
- Beginner-Friendly Dessert: With no oven required and simple, clear steps, this is a foolproof homemade dessert that guarantees impressive results every time.
- Perfect Make-Ahead Treat: The cheesecake needs to chill overnight, making it the ideal dessert to prepare a day in advance for parties, holidays, or family gatherings.
- Fresh & Flavorful: Using a fresh strawberry puree gives this cheesecake an authentic, vibrant berry flavor that’s miles ahead of artificial alternatives. It’s the perfect summer dessert.
Table of Contents
Why You’ll Love This No-Bake Strawberry Cheesecake Recipe
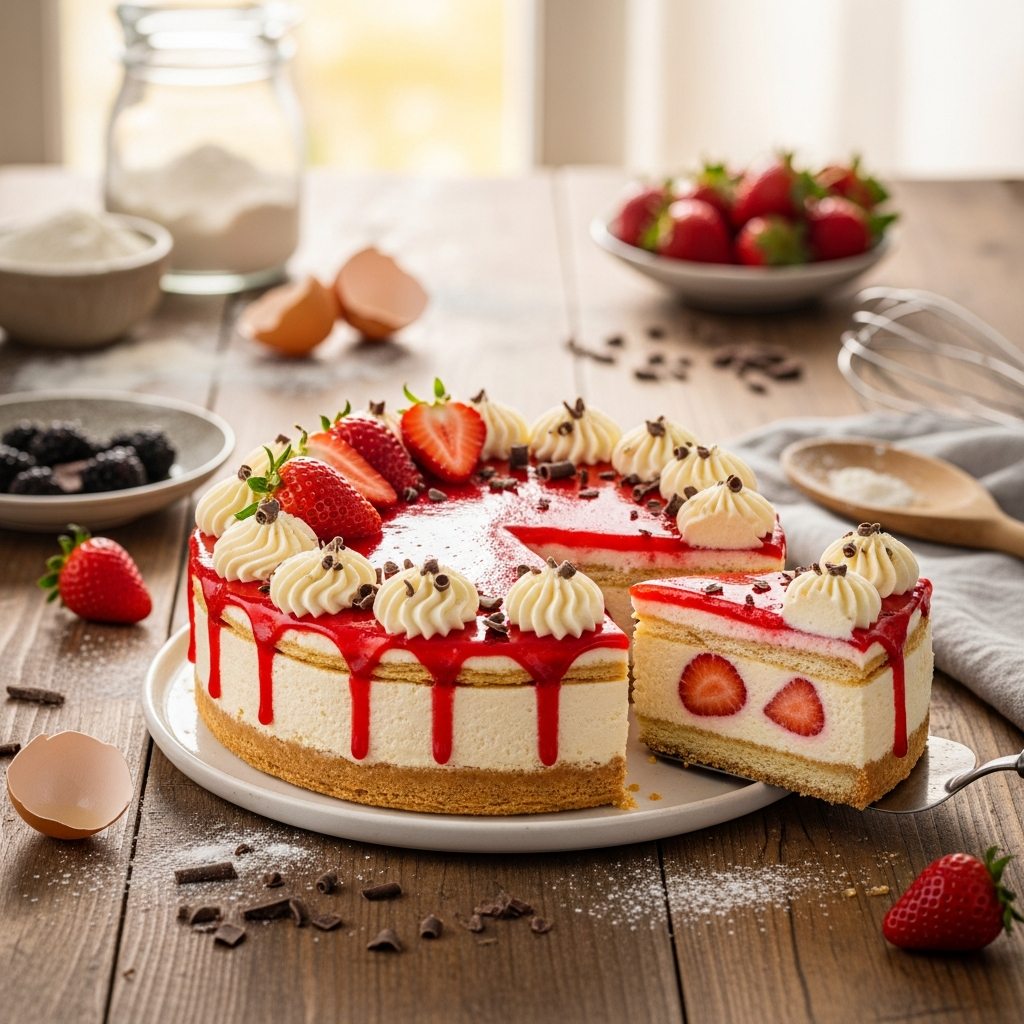
Welcome to the ultimate dessert for any occasion! This No-Bake Strawberry Cheesecake is the perfect blend of simplicity and elegance, delivering a rich, creamy, and decadent treat without ever turning on your oven. It’s a simple recipe that features a buttery graham cracker crust, a velvety smooth strawberry cream cheese filling, and a beautiful topping of fresh, juicy strawberries. The texture is light yet luxurious, making it a family-friendly dessert that everyone will adore.
What makes this recipe so special is its reliance on high-quality, fresh ingredients to create an authentic, vibrant flavor. We use a real strawberry puree in the filling, which provides a beautiful pink hue and a taste that is simply unmatched. Whether you’re looking for a stunning centerpiece for a summer party, a sweet treat for a special celebration, or just an easy dessert to satisfy your sweet tooth, this homemade cheesecake is the answer. It’s a from-scratch dessert that tastes like it came from a high-end bakery but is secretly one of the easiest recipes you’ll ever make.
Ingredients You’ll Need
Using the right ingredients is the key to achieving the perfect texture and flavor in this No-Bake Strawberry Cheesecake. Here’s exactly what you’ll need:
- For the Graham Cracker Crust:
- 2 cups (200g) crushed graham crackers or digestive biscuits
- 1/2 cup (113g) unsalted butter, melted
- 1/4 cup (50g) granulated sugar
- For the Strawberry Cheesecake Filling:
- 16 oz (452g) full-fat block cream cheese, softened to room temperature
- 1 1/2 cups (360ml) cold heavy whipping cream
- 1 cup (120g) powdered sugar, sifted
- 1 lb (450g) fresh strawberries, washed and hulled
- 1 tsp pure vanilla extract
- 1 tbsp fresh lemon juice
- For the Topping:
- 1 cup fresh strawberries, sliced or halved for decoration
- Fresh mint leaves (optional)
Equipment Needed
- 9-inch (23cm) round springform pan
- Food processor or a large Ziplock bag and rolling pin
- Large mixing bowl & Medium mixing bowl
- Electric hand mixer or stand mixer with whisk and paddle attachments
- Rubber spatula
- Blender or immersion blender
- Measuring cups and spoons
- Offset spatula or the back of a spoon
Step-by-Step Instructions
Follow these simple steps to create a flawless homemade cheesecake. We’ll start with the crust, move to the filling, and then assemble and chill.
Part 1: Prepare the Graham Cracker Crust
- Crush the Crackers: First, crush the graham crackers into fine crumbs using a food processor. Alternatively, you can place them in a Ziplock bag and crush them with a rolling pin. Transfer the crumbs to a medium bowl.
- Mix and Press: Afterward, add the granulated sugar and melted butter to the crumbs. Mix with a fork until the mixture resembles wet sand. Then, firmly press this mixture into the bottom and slightly up the sides of your 9-inch springform pan. Use the flat bottom of a glass to create an even, compact layer.
- Chill the Crust: Place the pan in the refrigerator to chill for at least 30 minutes while you prepare the filling. This step is crucial as it helps the crust firm up and hold its shape perfectly.
Part 2: Create the Creamy Strawberry Filling
- Prepare the Strawberry Puree: Take approximately 1 1/2 cups (about 225g) of your hulled strawberries and place them in a blender. Puree the strawberries until they are completely smooth. Set this puree aside for later use. Slice the remaining strawberries for the topping and set them aside as well.
- Whip the Heavy Cream: In a large, chilled mixing bowl, pour in the cold heavy whipping cream. Using an electric mixer, beat the cream on medium-high speed until stiff peaks form. Be careful not to over-whip. You will know it’s ready when the cream holds its shape and doesn’t collapse. Set this aside.
- Mix the Cream Cheese Base: In a separate large bowl, beat the softened cream cheese with the electric mixer on medium speed until it is completely smooth and free of lumps. Next, add the sifted powdered sugar, vanilla extract, and lemon juice. Continue to beat the mixture until everything is well combined and silky smooth, scraping down the sides of the bowl as needed.
Part 3: Assemble and Chill Your No-Bake Strawberry Cheesecake
- Combine the Filling: Pour the strawberry puree into the cream cheese mixture. Gently mix on low speed until just combined and the color is uniform. Then, using a rubber spatula, carefully fold the whipped cream into the strawberry-cream cheese mixture in two or three additions. Be gentle to maintain the airy texture of the whipped cream.
- Fill the Crust: Retrieve the chilled crust from the refrigerator. Gently pour the cheesecake filling over the crust and spread it into an even layer with an offset spatula or the back of a spoon. Smooth the top for a professional finish.
- Chill to Set: Cover the springform pan with plastic wrap, being careful not to let it touch the surface of the filling. Refrigerate the cheesecake for a minimum of 6-8 hours, but overnight is highly recommended for the best results. This long chill time is crucial for the cheesecake to set properly and achieve the perfect texture.
- Decorate and Serve: Once fully set, carefully run a thin knife around the edge of the pan before releasing the springform collar. Finally, arrange the fresh sliced strawberries on top of the cheesecake. Add a few mint leaves for a pop of color before slicing and serving this delicious dessert.
Watch: How to Make It

Baking Tips, Variations & Substitutions
Pro Tips for Perfect Results
- Use Room Temperature Cream Cheese: For a perfectly smooth, lump-free filling, your block cream cheese must be fully softened to room temperature. Cold cream cheese will result in a lumpy texture that is impossible to smooth out.
- Use Full-Fat Ingredients: Do not substitute low-fat cream cheese or light cream. The high fat content in full-fat block cream cheese and heavy whipping cream is essential for the cheesecake to set correctly and achieve its rich, creamy texture.
- Do Not Rush the Chilling Time: This recipe relies entirely on chilling to become firm. Cutting the chill time short will result in a soft cheesecake that won’t slice cleanly. Patience is key; chilling overnight is always the best option.
- Fold Gently: When incorporating the whipped cream, use a gentle folding motion with a spatula rather than vigorous stirring. This preserves the air you whipped into the cream, resulting in a lighter, more mousse-like texture.
Easy Variations You Can Try
- Chocolate Strawberry Cheesecake: Use crushed Oreo cookies (with the filling) for the crust. Drizzle the finished cheesecake with melted chocolate for an extra decadent touch.
- Mixed Berry Delight: Substitute the strawberry puree with a puree of mixed berries like raspberries, blueberries, and strawberries for a different flavor profile.
- Lemon-Berry Twist: Add the zest of one lemon to the cream cheese mixture along with the lemon juice to enhance the fresh, tangy flavor that pairs beautifully with strawberries.
- Gluten-Free Version: To make this a gluten-free no-bake strawberry cheesecake, simply swap the graham crackers for your favorite gluten-free cookies, such as gluten-free shortbread or vanilla wafers.
How to Serve & Store Your No-Bake Strawberry Cheesecake
This No-Bake Strawberry Cheesecake should be served chilled, directly from the refrigerator. It pairs wonderfully with a dollop of extra whipped cream or a drizzle of chocolate sauce. To store, cover the cheesecake tightly with plastic wrap or place it in an airtight container. It will keep well in the refrigerator for up to 4 days. For longer storage, you can freeze individual slices or the whole cheesecake. To freeze, place the cheesecake on a baking sheet in the freezer until firm, then wrap tightly in plastic wrap and a layer of aluminum foil. It can be frozen for up to 2 months. Thaw frozen cheesecake in the refrigerator for several hours before serving. For another amazing no-bake dessert, try our famous Biscoff cheesecake next!
Frequently Asked Questions
Why didn’t my no-bake cheesecake set properly?
Answer: The most common reason is not chilling it long enough. It truly needs at least 6-8 hours, and overnight is best. Another cause could be using low-fat ingredients (like spreadable cream cheese from a tub or light cream), which lack the necessary fat content to firm up. Finally, ensure your heavy cream is whipped to stiff peaks to provide structure.
Can I freeze this No-Bake Strawberry Cheesecake?
Answer: Absolutely! This cheesecake freezes very well. For best results, freeze it without the fresh strawberry topping. Wrap the whole cheesecake (or individual slices) tightly in plastic wrap, then a layer of foil. It will last for up to 2 months. Thaw it in the refrigerator overnight before decorating and serving.
Can I reduce the amount of sugar in this recipe?
Answer: You can slightly reduce the sugar, but keep in mind that sugar adds to the structure and stability of a no-bake cheesecake. Reducing it by more than 1/4 cup (30g) may result in a softer set. Taste the filling before adding the whipped cream to adjust sweetness if needed.
How can I make this recipe gluten-free?
Answer: It’s very simple to make this gluten-free! Just substitute the graham crackers or digestive biscuits in the crust with your favorite gluten-free cookies, such as gluten-free shortbread or vanilla wafers. The rest of the ingredients are naturally gluten-free.