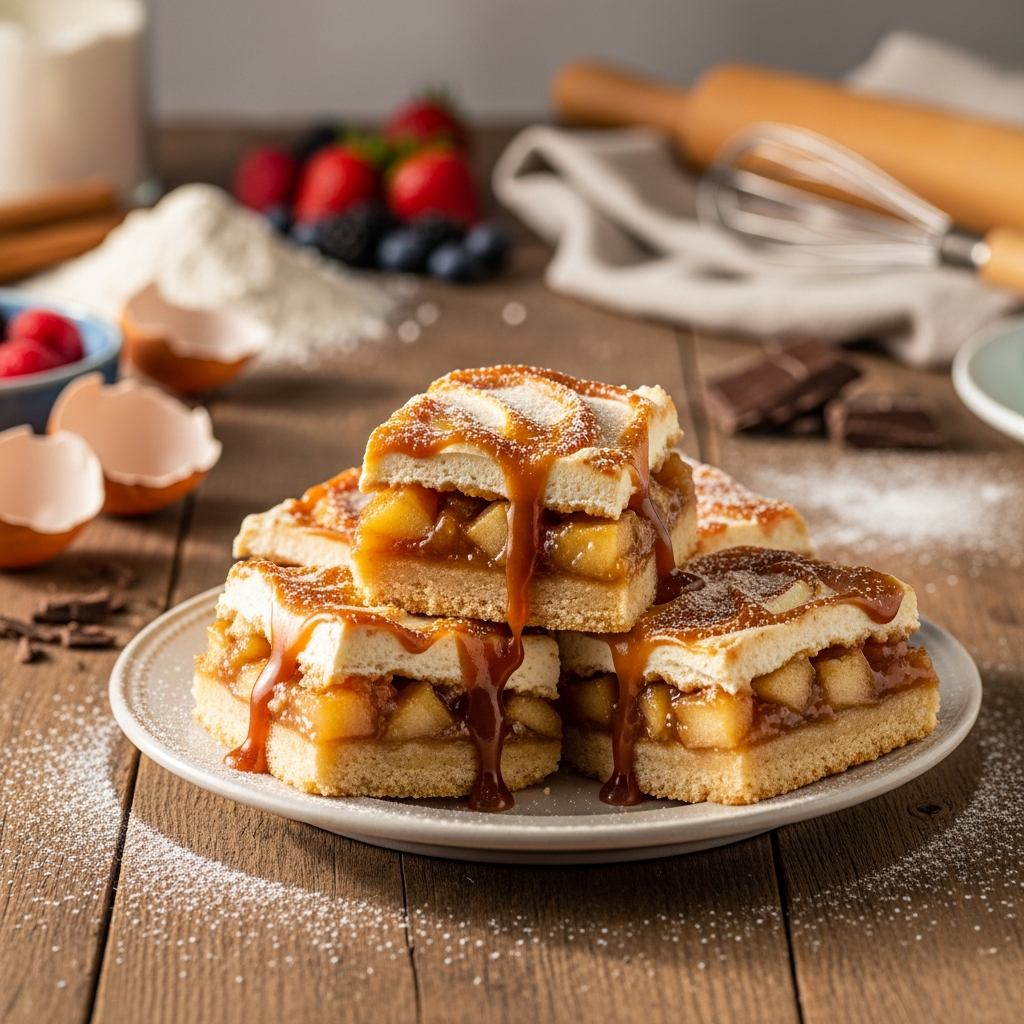
The Ultimate Salted Caramel Apple Pie Bars: A Perfect Fall Dessert
Estimated reading time: 7 minutes | Prep time: 35 minutes | Total time: 3 hours 30 minutes (includes cooling)
Key Takeaways
- Unforgettable Flavor & Texture: Experience the perfect harmony of a buttery shortbread crust, a gooey spiced apple filling, a crumbly topping, and a rich, homemade salted caramel drizzle.
- Beginner-Friendly Recipe: This simple, step-by-step guide breaks down the process, making these impressive bars achievable for bakers of all skill levels.
- Perfect for Making Ahead: These bars are freezer-friendly and store beautifully, making them an ideal dessert for planning ahead for parties, holidays, or family gatherings.
- Versatile Serving Options: Absolutely delicious on their own, but truly decadent when served warm with a scoop of vanilla ice cream or a dollop of whipped cream.
Table of Contents
Why You’ll Love This Salted Caramel Apple Pie Bars Recipe
Get ready to fall in love with your new favorite autumn dessert! These homemade Salted Caramel Apple Pie Bars capture all the cozy, comforting flavors of a classic apple pie but in a simple, shareable bar format. Imagine a tender, buttery shortbread crust that melts in your mouth, layered with perfectly spiced, tender-crisp apples, and topped with a golden crumble. As if that wasn’t enough, a generous drizzle of homemade salted caramel sauce takes these bars from delicious to absolutely divine.
What makes this recipe so special is its perfect balance of sweet and tart, soft and crunchy. Unlike a traditional pie, these bars are incredibly easy to make, slice, and serve, making them the ideal family-friendly dessert for any occasion. Whether you’re baking for a holiday get-together, a bake sale, or just a cozy weekend treat, this from-scratch recipe delivers impressive results every time. The combination of cinnamon-spiced apples and rich caramel is a timeless classic, and these bars are the perfect way to enjoy it.
Ingredients You’ll Need
Using high-quality, fresh ingredients is the key to creating the best Salted Caramel Apple Pie Bars. Here’s what you’ll need, broken down by component.
For the Shortbread Crust & Crumble Topping:
- All-Purpose Flour: 2 1/2 cups (300g) – Provides the structure for the crust and crumble.
- Unsalted Butter: 1 cup (227g) – Must be cold and cubed for a tender, flaky texture.
- Granulated Sugar: 1/2 cup (100g) – Adds sweetness and helps create a crisp texture.
- Salt: 1/4 teaspoon – Balances the sweetness.
- Vanilla Extract: 1 teaspoon – Adds a touch of warmth and flavor.
For the Spiced Apple Filling:
- Firm Apples: 4 medium (like Granny Smith or Honeycrisp) – Peeled, cored, and chopped into 1/2-inch pieces.
- Light Brown Sugar: 1/2 cup (100g), packed – Adds moisture and a hint of molasses flavor.
- All-Purpose Flour: 2 tablespoons (16g) – Helps thicken the apple juices.
- Ground Cinnamon: 1 teaspoon – The classic warm spice for apple desserts.
- Ground Nutmeg: 1/4 teaspoon – Complements the cinnamon beautifully.
- Lemon Juice: 1 tablespoon – Prevents the apples from browning and brightens the flavor.
For the Homemade Salted Caramel Sauce:
- Granulated Sugar: 1 cup (200g) – The base of our caramel.
- Water: 1/4 cup (60ml) – Helps the sugar dissolve evenly.
- Heavy Cream: 1/2 cup (120ml) – Must be at room temperature to prevent seizing.
- Unsalted Butter: 6 tablespoons (85g) – Cubed and at room temperature for a smooth sauce.
- Flaky Sea Salt: 1 1/2 teaspoons – The key to balancing the sweetness.
Step-by-Step Instructions
Follow these simple steps to create the most delicious apple pie bars from scratch. For best results, read through all the steps before beginning.
- Step 1: Prepare the Pan and Oven. First, preheat your oven to 375°F (190°C). Then, line a 9×13 inch baking pan with parchment paper, leaving a 2-inch overhang on the sides to act as handles. This will make removing the bars from the pan a breeze.
- Step 2: Make the Shortbread Mixture. In a large mixing bowl, whisk together the flour, granulated sugar, and salt. Add the cold, cubed butter. Using a pastry cutter, two knives, or your fingertips, cut the butter into the flour mixture until it resembles coarse crumbs or damp sand. Stir in the vanilla extract.
- Step 3: Press and Par-Bake the Crust. Reserve 1 cup of the shortbread mixture for the crumble topping and set it aside. Press the remaining mixture firmly and evenly into the bottom of your prepared pan. Bake for 15-18 minutes, or until the edges are just beginning to turn a light golden brown.
- Step 4: Prepare the Apple Filling. While the crust is par-baking, prepare the filling. In a medium bowl, combine the chopped apples, brown sugar, 2 tablespoons of flour, cinnamon, nutmeg, and lemon juice. Toss everything together until the apples are evenly coated.
- Step 5: Assemble the Bars. Once the crust is ready, remove it from the oven. Carefully spread the apple filling in an even layer over the warm, par-baked crust. Sprinkle the reserved 1 cup of crust mixture evenly over the top of the apples to create a delicious crumble topping.
- Step 6: Bake to Perfection. Place the pan back into the preheated oven. Bake for 30-35 minutes, until the apple filling is bubbly and the crumble topping is a deep golden brown.
- Step 7: Start the Salted Caramel Sauce. While the bars are baking, begin the caramel. In a small, heavy-bottomed saucepan, combine the 1 cup of granulated sugar and water. Stir just until the sugar is moistened, then place over medium-high heat. Allow the mixture to come to a boil without stirring. You can gently swirl the pan occasionally to ensure even cooking.
- Step 8: Finish the Caramel. Continue to cook the sugar mixture until it turns a deep amber color, like honey. Immediately remove the pan from the heat. Very carefully and slowly, whisk in the room-temperature heavy cream—be prepared for it to bubble up vigorously. Next, whisk in the cubed butter until the sauce is completely smooth. Finally, stir in the flaky sea salt.
- Step 9: Cool and Drizzle. Once the bars are finished baking, remove them from the oven and place the pan on a wire rack. Allow the bars to cool completely to room temperature in the pan, which will take at least 2 hours. This step is critical for clean slices. Once fully cooled, drizzle the salted caramel sauce generously over the top.
- Step 10: Slice and Serve. Let the caramel set for about 15-20 minutes. Then, use the parchment paper handles to lift the entire slab out of the pan. Place it on a cutting board and slice into bars. They are now ready to serve and enjoy!
Watch: How to Make It

Baking Tips, Variations & Substitutions
Pro Tips for Perfect Salted Caramel Apple Pie Bars
- Use Cold Ingredients for the Crust: For a tender, shortbread-like crust and a distinct crumble topping, your butter must be very cold. This creates pockets of steam during baking, resulting in a flaky, melt-in-your-mouth texture.
- Choose the Right Apples: The type of apple makes a huge difference. Granny Smith apples provide a wonderful tartness that balances the sweet caramel. For a sweeter but still firm option, Honeycrisp, Braeburn, or Gala are excellent choices. Avoid soft apples like Red Delicious, as they can become mushy.
- Patience is Key for Cooling: Do not attempt to slice the bars while they are still warm! Allowing them to cool completely in the pan is essential for the filling to set. Cutting them too soon will result in messy, falling-apart bars.
- Caramel Safety First: Melted sugar is extremely hot. When adding the cream and butter, stand back and pour slowly to control the vigorous bubbling. Never leave sugar unattended on the stove. Using room temperature cream and butter helps minimize the splattering.
- Don’t Skip the Par-Bake: Baking the crust for 15 minutes before adding the filling is crucial. It creates a moisture barrier that prevents the apple juices from making the bottom crust soggy.
Easy Variations You Can Try
- Add Nuts: For extra crunch and nutty flavor, add 1/2 cup of chopped pecans or walnuts to the crumble topping mixture before sprinkling it over the apples.
- Different Spices: Feel free to add 1/4 teaspoon of ground cardamom or ginger to the apple filling along with the cinnamon and nutmeg for a more complex spice profile.
- Use Pears: This recipe works wonderfully with firm pears, like Bosc or Anjou, as a substitute for apples.
- Store-Bought Caramel: If you’re short on time, a high-quality, thick, store-bought salted caramel sauce will work perfectly. Just warm it slightly to achieve a drizzling consistency.
How to Serve & Store Your Salted Caramel Apple Pie Bars
These bars are delightful served at room temperature or slightly warmed in the microwave for 15-20 seconds. For an extra decadent treat, serve a warm bar with a scoop of vanilla bean ice cream or a dollop of fresh whipped cream. To store, place the bars in a single layer in an airtight container. They will keep at room temperature for up to 2 days or in the refrigerator for up to 5 days. For longer storage, you can freeze them for up to 3 months. When you’re ready to try another fall favorite, give our Pumpkin Spice Snickerdoodles a try!
Frequently Asked Questions
Can I freeze these Salted Caramel Apple Pie Bars?
Yes, absolutely! For best results, freeze the bars without the caramel drizzle. Wrap the cooled, uncut slab tightly in plastic wrap, then a layer of aluminum foil. Freeze for up to 3 months. Thaw in the refrigerator overnight, then bring to room temperature, drizzle with freshly made or reheated caramel, and slice before serving.
Can I reduce the sugar content in this recipe?
You can slightly reduce the sugar in the apple filling and the crust mixture by a few tablespoons if you prefer a less sweet dessert. However, do not alter the sugar quantity in the salted caramel sauce, as its chemistry is essential for the proper texture and consistency.
Why did my crust turn out soggy?
A soggy crust is almost always caused by skipping the par-baking step. Baking the crust on its own for 15-18 minutes creates a seal that prevents the juices from the apple filling from soaking into the base. Ensure the crust is lightly golden before you add the filling.
Can I use a different size pan?
This recipe is optimized for a 9×13 inch pan. You could use a 9×9 inch square pan, but the layers will be much thicker, and you will need to increase the final baking time by 10-15 minutes. Keep a close eye on it to prevent the top from burning.