
The Ultimate Salted Caramel Pumpkin Cheesecake: A Perfect Holiday Dessert
Estimated reading time: 8-10 minutes | Prep time: 45 minutes | Total time: 9 hours (includes chilling)
Key Takeaways
- Unforgettable Flavor Profile: Experience the perfect balance of a spicy gingersnap cookie crust, a rich and creamy pumpkin spice filling, and a decadent, homemade salted caramel swirl.
- Silky-Smooth, Crack-Free Texture: Our step-by-step water bath and cooling instructions guarantee an ultra-creamy, professional-quality cheesecake without any cracks.
- Perfect Make-Ahead Dessert: This cheesecake needs to chill overnight, making it the ideal stress-free dessert for holidays like Thanksgiving or Christmas. It’s also freezer-friendly!
- A Showstopper for Any Occasion: While perfect for the holidays, this recipe is a stunning centerpiece for any family gathering, dinner party, or special celebration.
Table of Contents
Why You’ll Love This Salted Caramel Pumpkin Cheesecake Recipe
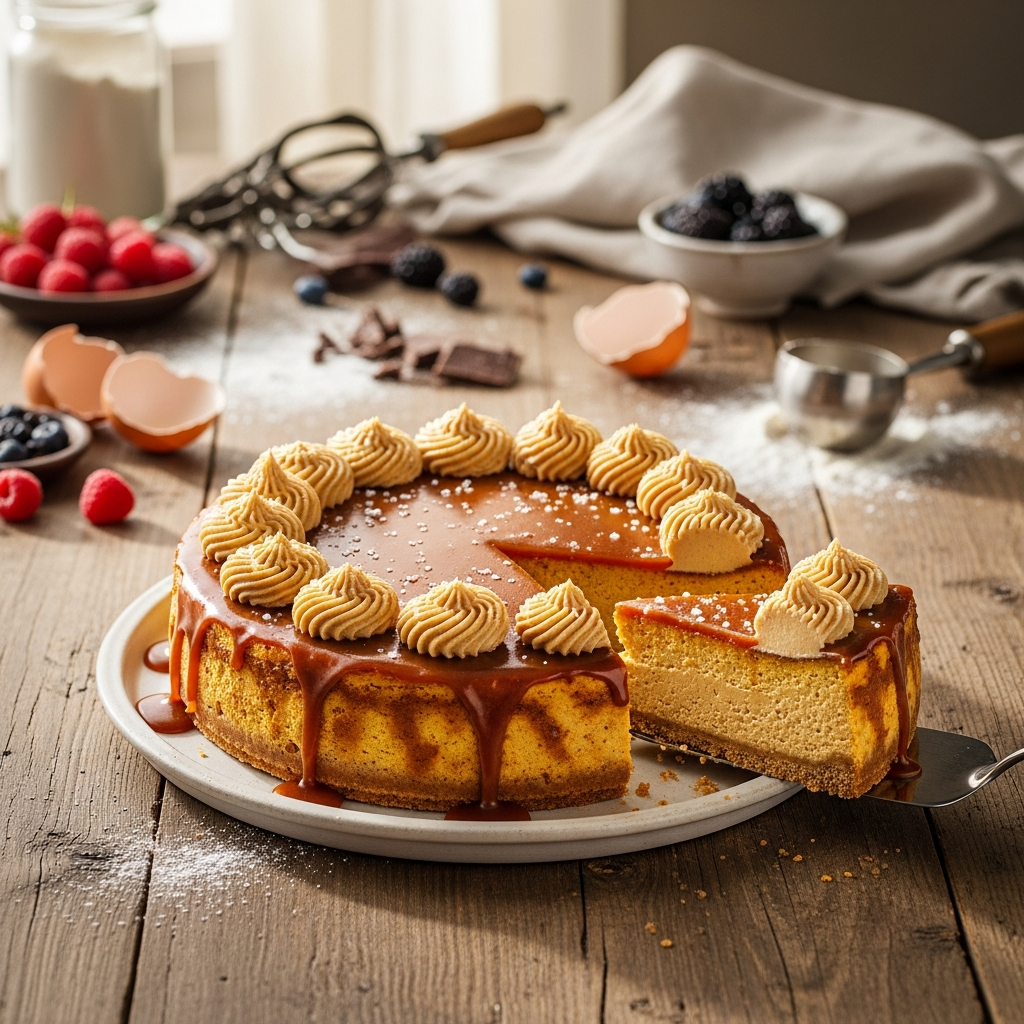
Get ready to fall in love with the ultimate autumn dessert. This homemade Salted Caramel Pumpkin Cheesecake is everything you could dream of: unbelievably creamy, perfectly spiced, and layered with flavors that sing of the holidays. We start with a crisp, spicy gingersnap cookie crust that provides the perfect counterpoint to the velvety pumpkin cheesecake filling. The filling itself is rich with pure pumpkin and a warm blend of cinnamon, ginger, nutmeg, and cloves, creating a cozy, nostalgic flavor in every single bite.
But the true star of the show is the luxurious, homemade salted caramel sauce. We don’t just drizzle it on top; we swirl it directly into the batter before baking, creating beautiful marbled pockets of sweet and salty bliss. The final result is a show-stopping, family-friendly dessert that looks like it came from a high-end bakery but is surprisingly achievable in your own kitchen. Our detailed instructions, especially on how to create a simple water bath, will guide you to a perfect, crack-free finish. This simple recipe is destined to become your go-to for Thanksgiving, Christmas, and every celebration in between.
Ingredients & Equipment You’ll Need
Using high-quality, room-temperature ingredients is the first step to achieving the perfect texture for this incredible pumpkin cheesecake. Here’s what you’ll need to gather.
For the Gingersnap Crust:
- 2 cups (200g) crushed gingersnap cookies
- 6 tablespoons (85g) unsalted butter, melted
- 2 tablespoons (25g) granulated sugar
- 1/4 teaspoon salt
For the Homemade Salted Caramel Sauce:
- 1 cup (200g) granulated sugar
- 1/4 cup (60ml) water
- 1/2 cup (120ml) heavy cream, warmed
- 4 tablespoons (57g) unsalted butter, cubed
- 1 teaspoon flaky sea salt
For the Creamy Pumpkin Cheesecake Filling:
- 32 oz (904g) full-fat block cream cheese, softened to room temperature
- 1 1/2 cups (300g) granulated sugar
- 1/4 cup (50g) packed light brown sugar
- 1 (15-oz) can (425g) pure pumpkin puree (not pumpkin pie filling)
- 4 large eggs, at room temperature
- 1/4 cup (60g) sour cream, at room temperature
- 2 teaspoons vanilla extract
- 1 1/2 teaspoons ground cinnamon
- 1/2 teaspoon ground ginger
- 1/4 teaspoon ground nutmeg
- 1/8 teaspoon ground cloves
- 1/2 teaspoon salt
Essential Equipment:
- 9-inch (23 cm) springform pan
- Large roasting pan (for the water bath)
- Heavy-duty aluminum foil
- Food processor or a zip-top bag and rolling pin
- Electric stand mixer with a paddle attachment or a hand mixer
- Various mixing bowls (large, medium, small)
- Silicone spatula
- Medium heavy-bottomed saucepan
- Whisk
- Measuring cups and spoons
- Wire cooling rack
Step-by-Step Instructions
This easy-to-follow guide will walk you through creating a flawless cheesecake from scratch. Let’s get started!
- Step 1: Preparation. First, position a rack in the middle of your oven and preheat to 350°F (175°C). Next, wrap the outside of your 9-inch springform pan with a double layer of heavy-duty aluminum foil, ensuring the foil goes all the way up the sides. This step is crucial for waterproofing the pan for the water bath later.
- Step 2: Make the Gingersnap Crust. In a food processor, pulse the gingersnap cookies until they form fine crumbs. Alternatively, place them in a zip-top bag and crush them with a rolling pin. Transfer the crumbs to a medium bowl and stir in the melted butter, granulated sugar, and salt until the mixture resembles wet sand. Firmly press this mixture into the bottom and slightly up the sides of the prepared springform pan. Bake the crust for 10 minutes. Finally, let it cool completely on a wire rack while you prepare the filling.
- Step 3: Create the Salted Caramel Sauce. In a medium, heavy-bottomed saucepan, combine the 1 cup of sugar and 1/4 cup of water. Heat over medium heat, stirring gently only until the sugar dissolves. After that, stop stirring and let the mixture come to a boil. Continue to cook, swirling the pan occasionally, until it turns a deep amber color, approximately 8-12 minutes. Immediately remove the pan from the heat. Carefully and slowly whisk in the warmed heavy cream; the mixture will bubble up vigorously. Next, whisk in the cubed butter until fully melted and smooth. Lastly, stir in the flaky sea salt. Set aside about 1/2 cup of the caramel for serving later, and let the rest cool slightly so it’s warm, not hot.
- Step 4: Beat the Cream Cheese. Reduce the oven temperature to 325°F (160°C). In the large bowl of a stand mixer fitted with the paddle attachment, beat the softened cream cheese on medium speed until completely smooth and creamy, scraping down the sides and bottom of the bowl as needed. This usually takes about 2-3 minutes. It is very important to start with smooth cream cheese to avoid lumps in the final product.
- Step 5: Add Sugars and Pumpkin. Add the granulated sugar and brown sugar to the cream cheese. Beat on medium-low speed until well combined and smooth. Next, add the pumpkin puree, sour cream, vanilla extract, and all the spices (cinnamon, ginger, nutmeg, cloves, and salt). Mix on low speed just until blended. Remember to scrape the bowl again to ensure everything is incorporated evenly.
- Step 6: Incorporate the Eggs. With the mixer on low speed, add the eggs one at a time, mixing just until each yolk disappears before adding the next. Be careful not to overmix at this stage. Overmixing incorporates too much air, which can cause the cheesecake to puff up and then crack as it cools.
- Step 7: Assemble and Swirl. Pour half of the cheesecake filling over the cooled crust. Drizzle about half of the slightly cooled caramel sauce (not the portion reserved for serving) over the filling. Then, gently pour the remaining cheesecake filling on top. Dollop the rest of the caramel over the surface. Use a knife or skewer to gently swirl the caramel into the filling for a beautiful marbled effect.
- Step 8: Prepare the Water Bath and Bake. Place the foil-wrapped springform pan into the large roasting pan. Carefully pour boiling water into the roasting pan until it comes about halfway up the sides of the springform pan. This water bath provides moisture and ensures the cheesecake bakes gently and evenly. Therefore, it is the best defense against cracks. Cautiously transfer the entire setup to the oven. Bake for 60 to 75 minutes. The cheesecake is done when the edges are set, but the center 2-3 inches still has a slight jiggle.
- Step 9: Cool Gradually to Prevent Cracks. Turn off the oven, but leave the cheesecake inside with the oven door cracked open for 1 hour. This slow cooling process is another key step to prevent cracking. Afterward, carefully remove the cheesecake from the water bath and the foil wrapping. Let it cool completely on a wire rack at room temperature.
- Step 10: Chill and Serve. Once at room temperature, cover the cheesecake with plastic wrap and transfer it to the refrigerator. Chill for at least 6 hours, but preferably overnight for the best flavor and texture. Before serving, run a thin knife around the edge and carefully remove the springform ring. Drizzle with the remaining reserved salted caramel sauce and enjoy!
Making the Crust and Caramel
Mixing the Perfect Cheesecake Filling
Assembling and Baking to Perfection
Baking Tips, Variations & Substitutions
Pro Tips for the Perfect Salted Caramel Pumpkin Cheesecake
- Room Temperature is Key: For a lump-free, silky-smooth cheesecake, your cream cheese, eggs, and sour cream must be at room temperature. This allows them to blend together seamlessly. Take them out of the fridge at least 2 hours before you begin.
- Don’t Overmix the Eggs: Once you add the eggs, mix on the lowest speed possible and only until they are just combined. Over-beating eggs incorporates excess air, which causes the cheesecake to rise too much in the oven and then crack as it cools.
- Blot Your Pumpkin Puree: For a denser, richer pumpkin flavor, you can blot the pumpkin puree before adding it to the batter. Simply spread it on a plate lined with a few paper towels and let it sit for about 15 minutes to absorb some of the excess water.
- Embrace the Water Bath: Do not skip the water bath (also known as a bain-marie). It creates a humid environment in the oven, which is essential for baking the cheesecake gently. This results in an ultra-creamy texture and a beautiful, crack-free surface.
Easy Variations & Substitutions
- Crust Variations: While gingersnaps are a perfect match, you can easily substitute them. A traditional graham cracker crust, a crust made from Biscoff cookies, or even crushed digestive biscuits would also be delicious. Simply substitute an equal amount of crumbs.
- Add a Nutty Crunch: For extra texture, consider adding 1/2 cup of toasted chopped pecans or walnuts to the crust mixture. You can also sprinkle them on top with the caramel sauce before serving.
- Chocolate Lover’s Twist: Swirl in a 1/4 cup of melted dark or semi-sweet chocolate along with the caramel for a decadent chocolate-pumpkin-caramel combination.
- Homemade Pumpkin Puree: Canned puree is great for consistency, but if you use homemade, ensure it is very thick. You may need to strain it or cook it down to remove excess water for the best cheesecake texture.
How to Serve & Store Your Salted Caramel Pumpkin Cheesecake
For the best presentation, drizzle your cheesecake with the reserved salted caramel sauce just before serving. For an extra touch of decadence, add a dollop of fresh whipped cream and a sprinkle of toasted pecans. To store, cover the cheesecake tightly with plastic wrap or place it in an airtight container in the refrigerator for up to 5 days. You can also freeze this dessert for longer storage. To do this, freeze the entire cheesecake or individual slices on a baking sheet until firm, then wrap tightly in plastic wrap and a layer of aluminum foil. It will keep beautifully in the freezer for up to 3 months. Thaw frozen cheesecake overnight in the refrigerator before serving for the perfect texture. If you love this recipe, you should try our moist banana bread next!
Watch: How to Make It

Frequently Asked Questions
Can I make this Salted Caramel Pumpkin Cheesecake ahead of time?
Yes, this is the perfect make-ahead dessert! It requires at least 6 hours to chill, but it’s even better when chilled overnight. You can make it up to 2 days in advance, keeping it covered in the refrigerator until you’re ready to serve.
Can I freeze this cheesecake?
Absolutely! This cheesecake freezes beautifully. You can freeze it whole or in pre-cut slices. For best results, chill it completely in the fridge first. Then, wrap it securely in a double layer of plastic wrap and a final layer of aluminum foil. It can be frozen for up to 3 months. Thaw it in the refrigerator overnight before serving.
Can I reduce the amount of sugar in this recipe?
You can slightly reduce the sugar, but it will impact the final texture and taste. Sugar provides not only sweetness but also moisture and structure. We recommend not reducing the total sugar in the filling by more than 1/4 cup (50g) to maintain the integrity of the cheesecake.
What kind of pumpkin puree should I use?
Be sure to use 100% pure pumpkin puree, not pumpkin pie filling. Pie filling has added sugars and spices that will alter the recipe’s flavor and sweetness. Canned puree works perfectly and provides consistent results, but you can use thick, well-drained homemade puree as well.