
The Ultimate Strawberry Crunch Poke Cake Recipe (From Scratch!)
Estimated reading time: 7 minutes | Prep time: 30 minutes | Total time: 4 hours 30 minutes (includes chilling)
Key Takeaways
- Unforgettable Texture Trio: Experience the perfect harmony of a super moist, gelatin-infused vanilla cake, a lusciously creamy cream cheese frosting, and an addictively crispy strawberry-vanilla cookie crumble on top.
- Surprisingly Simple & Fun: This homemade recipe is incredibly straightforward. Poking the holes and pouring the gelatin is a fun activity, and using freeze-dried strawberries ensures a powerful, authentic flavor without any sogginess.
- Perfect Make-Ahead Dessert: Prepare the cake base a day in advance for the best flavor infusion. Simply add the frosting and crunchy topping right before serving to impress your guests with minimal last-minute effort.
- A Crowd-Pleasing Favorite: This Strawberry Crunch Poke Cake is a guaranteed hit at potlucks, family gatherings, and summer barbecues. It’s a nostalgic treat that both kids and adults will adore.
Table of Contents
Why You’ll Love This Strawberry Crunch Poke Cake Recipe
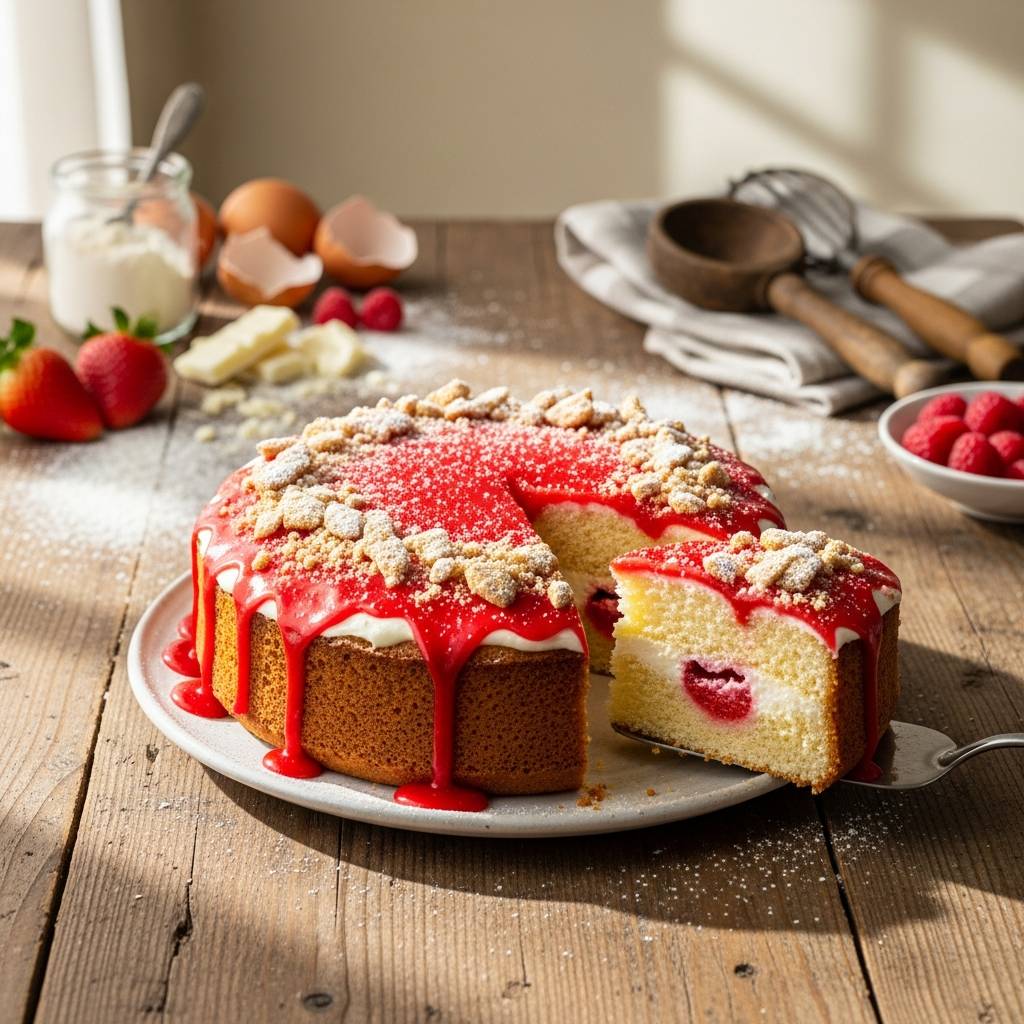
Get ready to discover your new favorite dessert! This homemade Strawberry Crunch Poke Cake is the perfect blend of nostalgia and gourmet flavor, reminiscent of those beloved strawberry shortcake ice cream bars. We start with a tender, from-scratch vanilla cake that’s light and airy. After baking, it gets infused with a sweet strawberry gelatin, making every single bite incredibly moist and flavorful. This simple recipe ensures a perfect texture every time.
What truly sets this cake apart is the combination of textures. The soft, strawberry-soaked cake is topped with a rich and tangy cream cheese frosting that’s creamy without being overly sweet. The grand finale is the irresistible strawberry crunch topping—a buttery, crispy crumble made from Golden Oreos and vibrant freeze-dried strawberries. It’s a family-friendly dessert that’s as fun to make as it is to eat. Whether you’re making it for a birthday party, a summer potluck, or just a weeknight treat, this cake is guaranteed to disappear in minutes.
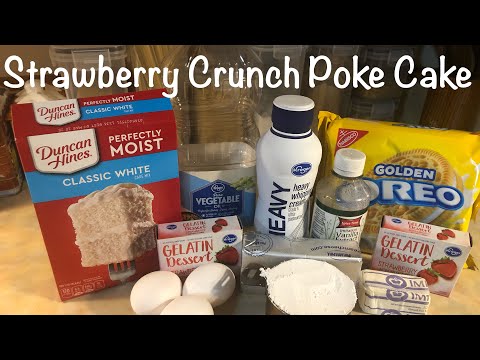
Ingredients You’ll Need
Using high-quality, room-temperature ingredients is the first step to creating the perfect Strawberry Crunch Poke Cake. Here’s what you’ll need:
For the Moist Vanilla Cake:
- All-Purpose Flour: 2 1/2 cups (300g) – Provides the structure for our tender cake.
- Granulated Sugar: 1 1/2 cups (300g) – For sweetness and moisture.
- Baking Powder: 1 tablespoon – The key leavening agent for a light, fluffy crumb.
- Salt: 1/2 teaspoon – Balances the sweetness and enhances all other flavors.
- Whole Milk: 1 cup (240ml), at room temperature – Adds richness and moisture.
- Vegetable Oil: 1/2 cup (120ml) – Guarantees a super moist cake.
- Large Eggs: 2, at room temperature – Binds the batter and adds richness.
- Vanilla Extract: 2 teaspoons – For that classic, warm vanilla flavor.
- Hot Water: 1/2 cup (120ml) – A secret ingredient that blooms the cocoa and creates an incredibly tender texture.
For the Strawberry Gelatin Filling:
- Strawberry Flavored Gelatin: 1 package (3 oz / 85g), such as Jell-O.
- Boiling Water: 1 cup (240ml).
- Cold Water: 1/2 cup (120ml).
For the Irresistible Strawberry Crunch Topping:
- Golden Oreo Cookies: 12 cookies (or similar vanilla sandwich cookies), about 1 1/2 cups (150g) crushed.
- Freeze-Dried Strawberries: 1/2 cup (15g) – Provides intense, authentic strawberry flavor and crunch.
- Unsalted Butter: 4 tablespoons (57g), melted.
For the Creamy Cream Cheese Frosting:
- Cream Cheese: 8 oz (226g), softened to room temperature.
- Powdered Sugar: 1 cup (120g), sifted to remove lumps.
- Vanilla Extract: 1 teaspoon.
- Heavy Whipping Cream: 1 1/2 cups (360ml), cold (or an 8 oz tub of frozen whipped topping, thawed).
Step-by-Step Instructions
Follow these simple steps to create a showstopping dessert that everyone will love.
- Prep Oven and Pan: First, preheat your oven to 350°F (175°C). Generously grease and flour a 9×13 inch (23×33 cm) baking pan to prevent the cake from sticking.
- Mix Dry Ingredients: In a large mixing bowl, whisk together the all-purpose flour, granulated sugar, baking powder, and salt. Whisking ensures the leavening agent is evenly distributed for a perfect rise.
- Combine Wet Ingredients: In a separate medium bowl, whisk the room temperature milk, vegetable oil, eggs, and vanilla extract until the mixture is smooth and cohesive.
- Create the Batter: Pour the wet ingredients into the dry ingredients. Using an electric mixer on low speed, mix just until the batter comes together. Scrape down the sides of the bowl, but be careful not to overmix at this stage.
- Add Hot Water and Bake: With the mixer still on low, carefully pour the hot water into the batter. The batter will be quite thin; this is exactly what you want for a moist cake. Immediately pour the batter into your prepared pan and spread it evenly. Bake for 30-35 minutes, or until a wooden skewer inserted into the center comes out clean.
- Poke and Soak the Cake: Let the cake cool on a wire rack for about 15-20 minutes. While it’s still warm, use the round handle of a wooden spoon to poke holes all over the top, about an inch apart. In a small bowl, whisk the strawberry gelatin powder into the boiling water until fully dissolved (about 2 minutes), then stir in the cold water.
- Chill the Cake: Slowly and evenly pour the strawberry gelatin mixture over the warm, poked cake, guiding it into the holes. Cover the pan with plastic wrap and refrigerate for at least 3-4 hours, or overnight, until the gelatin is fully set.
- Prepare the Crunch Topping: While the cake chills, make the topping. In a food processor, pulse the Golden Oreos and freeze-dried strawberries until they form coarse crumbs. If you don’t have a food processor, place them in a zip-top bag and crush them with a rolling pin. Transfer the crumbs to a bowl, pour in the melted butter, and toss with a fork until all the crumbs are lightly coated. Set aside.
- Make the Frosting: In a large bowl, use an electric mixer to beat the softened cream cheese until it’s completely smooth. Add the sifted powdered sugar and vanilla extract, mixing on low until combined, then increase to medium-high until light and creamy. If using heavy cream, whip it in a separate chilled bowl to stiff peaks, then gently fold it into the cream cheese mixture. If using whipped topping, simply fold it in until no streaks remain.
- Assemble and Serve: Once the cake is fully chilled, spread the creamy frosting evenly over the top. Sprinkle the strawberry crunch topping generously over the frosting, covering the entire surface. For the best texture, chill the assembled cake for 30 minutes before slicing. Serve cold and enjoy!
Baking Tips, Variations & Substitutions
Pro Tips for the Perfect Strawberry Crunch Poke Cake
- Room Temperature is Non-Negotiable: For a silky-smooth cake batter, ensure your eggs, milk, and cream cheese are all at room temperature. This helps them emulsify properly, preventing a lumpy batter and resulting in a more tender, even crumb.
- Avoid Overmixing: The number one rule for a tender cake is not to overmix the batter after adding the flour. Mix just until you no longer see streaks of flour. A few small lumps are okay! Overmixing develops gluten, which leads to a tough, dense cake.
- Even Soaking Technique: To ensure every slice is perfectly moist, poke your holes evenly across the entire cake surface, about one inch apart. Pour the gelatin mixture slowly and deliberately to help it absorb evenly instead of pooling in one spot.
- The Crispiest Crunch Topping: For maximum crunch, store the prepared topping in an airtight container at room temperature and sprinkle it over the cake just before serving. This prevents it from absorbing moisture from the frosting and becoming soft.
Easy Variations You Can Try
- Different Gelatin Flavors: Feel free to experiment! Raspberry, cherry, or even lime gelatin would create delicious and colorful variations of this poke cake.
- Boxed Cake Mix Shortcut: In a hurry? You can substitute the from-scratch cake with one standard box of white or vanilla cake mix. Prepare and bake according to package directions, then pick up from Step 6 of our instructions.
- Add a Garnish: Top the finished cake with fresh, sliced strawberries or a few whole Golden Oreos for a beautiful presentation.
- Nutty Crunch: For extra texture, try adding 1/4 cup of finely chopped pecans or macadamia nuts to the crunch topping mixture.
How to Serve & Store Your Strawberry Crunch Poke Cake
This Strawberry Crunch Poke Cake is at its absolute best when served chilled, straight from the refrigerator. The cold temperature keeps the frosting firm and enhances the cool, refreshing quality of the gelatin-infused cake. For storage, cover the baking pan tightly with plastic wrap or transfer individual slices to an airtight container. The cake will remain fresh and delicious in the refrigerator for up to 4 days. Please note that the crunch topping will soften over time as it absorbs moisture. Due to the cream cheese frosting, this cake should not be stored at room temperature. For another easy and delicious dessert, try our reader-favorite moist banana bread recipe!
Watch: How to Make It

Frequently Asked Questions
Can I use fresh strawberries for the crunch topping?
We strongly advise against using fresh strawberries in the crunch topping. Their moisture content will immediately make the cookie crumbs soggy. Freeze-dried strawberries are essential as they provide a concentrated, authentic strawberry flavor while maintaining a perfectly dry, crunchy texture. You can, however, use fresh sliced strawberries as a beautiful garnish on the finished cake!
Can I freeze this Strawberry Crunch Poke Cake?
Yes, you can freeze this cake, but it’s best to do so in stages for optimal texture. You can freeze the cake base after it has been soaked with gelatin and has cooled completely. Wrap it tightly in two layers of plastic wrap and then a layer of aluminum foil for up to 2 months. Thaw it overnight in the refrigerator, then prepare the frosting and topping to assemble before serving. Freezing the fully assembled cake will cause the crunch topping to lose all of its crispiness upon thawing.
Can I reduce the sugar in this recipe?
You can make slight adjustments. The granulated sugar in the cake can be reduced by up to 1/4 cup (50g) without significantly impacting the texture. The powdered sugar in the frosting can also be adjusted to your taste preference. However, do not alter the amount of sugar in the gelatin packet, as it is crucial for the gelatin to set correctly.
Can I use a boxed cake mix instead of making it from scratch?
Absolutely! To save time, you can use one standard-sized box of white, yellow, or vanilla cake mix. Simply prepare and bake it according to the package directions for a 9×13 inch pan. Once baked, you can start from Step 6 of our instructions for poking and soaking the cake. It’s a great shortcut for this easy dessert.