
My earliest memory of true culinary magic doesn’t involve a fancy restaurant or a complex pastry. Instead, it takes me back to my grandmother’s sun-drenched kitchen, the rhythmic whir of an old-fashioned hand-crank ice cream maker, and the intoxicating scent of pure vanilla. It was a scorching summer afternoon, and Nana, with flour perpetually dusted on her apron, declared it a “homemade ice cream day.” We’d spend hours, taking turns at the crank, peeking in with anticipation, and finally, experiencing the pure joy of that first spoonful. That cold, creamy sweetness, made with love and simple ingredients, was a revelation. It wasn’t just dessert; it was a tangible expression of care, a moment suspended in time, and it instilled in me a lifelong passion for creating delectable treats. Today, that passion drives me to share the best **homemade ice cream** recipes, ensuring everyone can experience that same simple magic.
Making your own **homemade ice cream** is an art, a science, and an absolute delight. If you’ve ever yearned for that perfect scoop, brimming with flavor and unmatched freshness, you’re in the right place. Dive into the world of truly exceptional desserts, starting with our definitive guide to crafting the most incredible **homemade ice cream** right in your own kitchen. Forget mass-produced tubs; 2025 is the year of your best frozen creations!
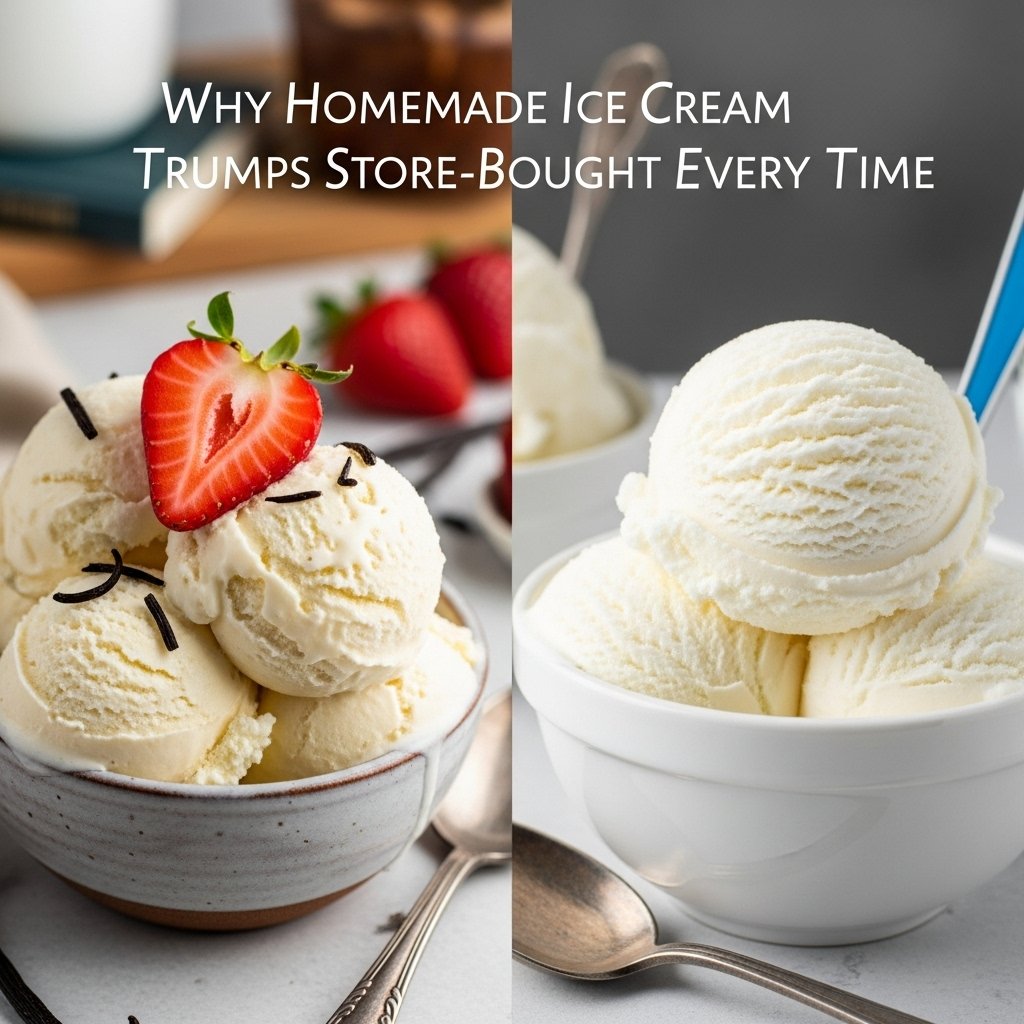
Why Homemade Ice Cream Trumps Store-Bought Every Time
There’s a reason why the phrase “homemade” instantly conjures images of warmth, comfort, and superior quality. When it comes to ice cream, this sentiment couldn’t be more accurate. While store shelves are overflowing with countless options, nothing quite compares to the experience of a truly homemade ice cream. Here’s why:
- Unmatched Freshness and Flavor Control: When you make ice cream at home, you control every single ingredient. This means using the freshest dairy, the ripest fruits, the purest extracts, and premium chocolate. You can adjust sugar levels, tweak flavor profiles, and ensure every scoop bursts with vibrant, authentic taste that processed versions simply can’t replicate.
- Superior Texture: The magic of homemade ice cream lies in its texture. Without the need for stabilizers, gums, and excessive air pumped in (which increases volume but diminishes density), your homemade batch will be incredibly creamy, dense, and melt-in-your-mouth smooth. It’s a texture that speaks of richness and quality.
- No Artificial Additives: Say goodbye to high-fructose corn syrup, artificial colors, flavors, and preservatives. Crafting your own means a clean ingredient list, giving you peace of mind about what you and your loved ones are consuming.
- Endless Customization: This is where the true fun begins! Do you dream of a lavender honey ice cream? A bourbon pecan? Or perhaps a dairy-free coconut mango swirl? The world is your oyster. Homemade ice cream allows you to experiment with unique flavor combinations that you’d never find in a supermarket freezer. It’s an expression of your culinary creativity.
- The Joy of Creation: Beyond the delicious end product, there’s an immense satisfaction in the process itself. From whisking the custard to watching the churner work its magic, and finally, digging into that first glorious scoop, making homemade ice cream is a rewarding experience that creates lasting memories.
Embracing the art of **homemade ice cream** elevates a simple dessert into an experience, a craft, and a moment of pure, unadulterated pleasure. It’s time to unlock the secrets to creamy perfection.
Essential Tools for Your Homemade Ice Cream Journey
While the magic ultimately comes from your hands and creativity, having the right tools can make the process of crafting incredible **homemade ice cream** significantly smoother and more enjoyable. You don’t need a professional kitchen, but a few key items are invaluable:
- Ice Cream Maker: This is, of course, the star of the show. There are several types:
- Compressor Ice Cream Makers: These are the most convenient, as they have a built-in freezing unit and don’t require pre-freezing a bowl. They’re an investment but offer spontaneity.
- Freezer Bowl Ice Cream Makers: More common and budget-friendly, these require you to freeze the insulated bowl for 12-24 hours before churning. Plan ahead!
- Old-Fashioned Hand-Crank or Electric Bucket Makers: These use ice and rock salt to freeze the mixture, often evoking nostalgic charm and larger batches.
(My personal preference for home use is a freezer bowl model for its simplicity and relatively small footprint.)
- Heavy-Bottomed Saucepan: Essential for cooking your custard base. A heavy bottom ensures even heating and prevents scorching.
- Whisk: For smoothly combining ingredients and preventing lumps in your custard.
- Fine-Mesh Sieve: Crucial for straining your custard base, ensuring a silky-smooth texture by removing any cooked egg bits or vanilla bean pieces.
- Heat-Resistant Spatula: For stirring the custard and scraping down the sides of pots and bowls.
- Large Bowl (preferably metal or glass): For chilling your custard base over an ice bath.
- Airtight Container: For storing your freshly churned ice cream in the freezer. Glass or sturdy plastic containers with tight-fitting lids work best to prevent freezer burn.
- Ice Bath Setup: A larger bowl filled with ice and a little water, used to quickly cool your hot custard base. This is vital for food safety and flavor.
- Measuring Cups and Spoons: Accuracy is key in baking and ice cream making.
- Kitchen Scale (Optional but Recommended): For precise measurements, especially of dry ingredients, which can significantly impact the final texture.
With these tools at your disposal, you’re well-equipped to embark on your delicious journey of making the very best **homemade ice cream**.
My Signature Recipe: Brown Butter Vanilla Bean with Candied Walnut Brittle Swirl
Recipe Overview
This recipe for Brown Butter Vanilla Bean with Candied Walnut Brittle Swirl Ice Cream is a celebration of classic comfort elevated with sophisticated twists. The brown butter infuses the creamy vanilla base with a nutty, caramel-like depth, while genuine vanilla bean specks promise an authentic, aromatic experience. Swirled throughout is a homemade candied walnut brittle, offering irresistible crunch and a delightful counterpoint to the silky smooth ice cream. It’s a symphony of textures and flavors – rich, creamy, nutty, and sweet with just a hint of salty crunch. This isn’t just ice cream; it’s an indulgence designed to impress and satisfy.
Prep Time, Cook Time, Servings
- Prep Time: 30 minutes (active) + 4-8 hours (chilling)
- Churn Time: 20-30 minutes
- Freeze Time: 4-6 hours (for firming)
- Yields: Approximately 1.5 Quarts (1.4 Liters) / 8-10 servings
Ingredients
For the Brown Butter Vanilla Bean Ice Cream Base:
- 1 cup (226g) Unsalted Butter
- 2 Vanilla Beans, split lengthwise and scraped
- 1½ cups (355ml) Whole Milk
- 1½ cups (355ml) Heavy Cream (minimum 36% fat)
- ¾ cup (150g) Granulated Sugar
- ¼ cup (50g) Light Brown Sugar, packed
- ⅛ teaspoon Fine Sea Salt
- 5 large Egg Yolks
- 1 tablespoon Pure Vanilla Extract
For the Candied Walnut Brittle Swirl:
- 1 cup (120g) Walnuts, roughly chopped
- ½ cup (100g) Granulated Sugar
- 2 tablespoons Water
- 1 tablespoon Unsalted Butter
- ¼ teaspoon Fine Sea Salt
- Pinch of Baking Soda
Step-by-Step Instructions
Part 1: Making the Candied Walnut Brittle
- Prepare your surface: Line a baking sheet with parchment paper or a silicone mat. Have it ready near your stovetop.
- Toast Walnuts (Optional but Recommended): In a dry skillet over medium heat, toast the chopped walnuts for 3-5 minutes, stirring frequently, until fragrant. Be careful not to burn them. Set aside.
- Make the Caramel: In a medium, heavy-bottomed saucepan, combine the granulated sugar and water. Stir gently to moisten all the sugar. Cook over medium heat without stirring until the sugar dissolves and the mixture begins to boil. Continue cooking, swirling the pan occasionally, until the caramel turns a deep amber color. This usually takes 5-8 minutes. Watch it carefully as it can burn quickly.
- Add Butter, Salt, and Baking Soda: Remove the pan from the heat. Carefully stir in the unsalted butter, sea salt, and baking soda. The mixture will bubble vigorously. Stir until combined.
- Incorporate Walnuts: Quickly stir in the toasted walnuts until they are evenly coated in the caramel.
- Spread and Cool: Immediately pour the mixture onto the prepared baking sheet. Using a heat-resistant spatula or the back of a spoon, quickly spread it into a thin, even layer. Let it cool completely at room temperature for at least 30 minutes, or until hard and brittle.
- Break the Brittle: Once cooled, break the brittle into small, irregular pieces. You can do this by hand or by placing it in a bag and gently tapping with a rolling pin. Set aside.
Part 2: Preparing the Brown Butter Vanilla Bean Ice Cream Base
- Brown the Butter: In a medium, heavy-bottomed saucepan, melt the 1 cup of unsalted butter over medium heat. Continue to cook, stirring occasionally, until the butter foams, then turns golden, then amber, and finally develops small brown specks at the bottom and a nutty aroma. This is brown butter (beurre noisette). Be careful not to burn it. Remove from heat immediately.
- Infuse the Dairy: Pour the brown butter (including the browned bits at the bottom) into another clean, heavy-bottomed saucepan. Add the whole milk, heavy cream, granulated sugar, brown sugar, and sea salt. Scrape the seeds from the vanilla beans into the mixture, and add the empty vanilla pods as well.
- Heat the Dairy: Place the saucepan over medium-low heat. Heat gently, stirring occasionally, until the sugars are completely dissolved and the mixture is warm but not boiling. Remove from heat. Cover, and let the vanilla bean pods steep in the warm mixture for at least 30 minutes (or up to an hour) to intensify the vanilla flavor.
- Prepare Egg Yolks: In a separate medium bowl, whisk the egg yolks until they are smooth and slightly lighter in color.
- Temper the Yolks: Remove the vanilla pods from the steeped cream mixture. Slowly, ladle about 1 cup of the warm cream mixture into the whisked egg yolks, whisking constantly to temper the yolks (this prevents them from scrambling).
- Combine and Cook Custard: Pour the tempered egg yolk mixture back into the saucepan with the remaining cream mixture. Return the saucepan to medium-low heat. Cook, stirring constantly with a heat-resistant spatula, until the custard thickens enough to coat the back of a spoon (it should reach about 175°F-180°F / 79°C-82°C). Do NOT boil, or the eggs will scramble.
- Strain and Chill: Immediately remove the custard from the heat. Strain it through a fine-mesh sieve into a clean bowl set over an ice bath (a larger bowl filled with ice and a little water). This stops the cooking process and ensures a perfectly smooth texture. Stir occasionally until the custard is completely cold (about 30-45 minutes). Stir in the pure vanilla extract.
- Refrigerate: Cover the bowl with plastic wrap, pressing it directly onto the surface of the custard to prevent a skin from forming. Refrigerate for at least 4 hours, or preferably overnight, until thoroughly chilled. A perfectly chilled base is key for the best homemade ice cream texture.
Part 3: Churning and Finishing the Ice Cream
- Churn the Ice Cream: Once the base is thoroughly chilled, pour it into your ice cream maker’s freezer bowl and churn according to the manufacturer’s instructions. This usually takes 20-30 minutes, until the mixture is thick and resembles soft-serve ice cream.
- Swirl in Brittle: During the last 5 minutes of churning, or after the churning is complete, add about three-quarters of the broken candied walnut brittle pieces to the ice cream maker. Let it churn briefly to incorporate, or gently fold it in by hand.
- Transfer and Freeze: Transfer the soft ice cream to an airtight freezer-safe container. Layer the remaining brittle pieces throughout the ice cream as you transfer it. Press plastic wrap directly onto the surface of the ice cream and seal the container.
- Harden: Freeze for at least 4-6 hours (or preferably overnight) to allow the ice cream to firm up to a scoopable consistency.
- Serve: Let the ice cream sit at room temperature for a few minutes before serving to soften slightly for the perfect scoop. Enjoy your magnificent **homemade ice cream**!
Tips for Achieving Perfect Homemade Ice Cream
Creating exceptional **homemade ice cream** is a rewarding endeavor, and a few expert tips can help you achieve creamy, flavorful results every time:
- Chill Your Base Thoroughly: This is arguably the most crucial step for a superior texture. A super-cold base (refrigerated for at least 4-8 hours, or overnight) will churn faster and incorporate less air, resulting in a denser, creamier ice cream with smaller ice crystals.
- Use High-Quality Ingredients: Since there are no artificial flavors to hide behind, the quality of your dairy, eggs, vanilla, and any other flavorings will shine through. Opt for full-fat dairy, fresh eggs, and pure extracts for the best taste.
- Don’t Overfill Your Churner: Always check your ice cream maker’s capacity. As the mixture churns, it incorporates air and expands. Overfilling can lead to an inefficient churn and a less desirable texture.
- Keep Everything Cold: Beyond the base, ensure your ice cream maker bowl is properly frozen (for freezer-bowl models) and your storage container is chilled before transferring the soft-serve. The goal is to minimize melting and refreezing, which causes large ice crystals.
- Patience During Churning: Let your machine do its job. Churn until the ice cream reaches the consistency of soft-serve. While tempting to stop early, sufficient churning incorporates the right amount of air for a smooth texture.
- Add Inclusions at the End: Swirl in solid additions like nuts, chocolate chips, fruit pieces, or brittle during the last 5 minutes of churning or after the churn cycle is complete. This prevents them from being pulverized or sinking to the bottom.
- Store Properly: Transfer your freshly churned ice cream to an airtight, freezer-safe container. Press plastic wrap directly onto the surface of the ice cream before sealing the lid. This prevents freezer burn and keeps your ice cream fresh for longer.
- Adjust Sweetness Carefully: Remember that cold dulls sweetness. Your base mixture should taste slightly sweeter than you’d prefer for a beverage. However, avoid adding too much sugar, as it can interfere with the freezing process and create a grainy texture.
- Alcohol for Softness (Optional): A small amount of alcohol (e.g., 1-2 tablespoons of a liqueur like rum or bourbon for a 1-quart batch) can lower the freezing point, resulting in a slightly softer, more scoopable ice cream straight from the freezer.
With these pointers, your next batch of **homemade ice cream** is sure to be a triumph!
Frequently Asked Questions About Homemade Ice Cream
Q: My ice cream is icy and hard, not creamy. What went wrong?
A: Several factors can lead to icy ice cream. The most common reasons are not chilling the base thoroughly enough before churning, over-churning (which incorporates too much air leading to larger ice crystals), or a recipe with too high a water content or too little fat/sugar. Ensure your base is very cold, churn just until soft-serve consistency, and always use full-fat dairy for a custard base.
Q: How long does homemade ice cream last in the freezer?
A: For optimal texture and flavor, homemade ice cream is best consumed within 1-2 weeks. After that, it can start to develop ice crystals and lose its fresh taste, though it will still be safe to eat for up to a month if stored in an airtight container.
Q: Can I make ice cream without an ice cream maker?
A: Yes, you can! The “no-churn” method typically involves whipping heavy cream to stiff peaks and folding it into a sweetened condensed milk base, often with other flavorings. While it produces a delicious, creamy result, the texture is distinct from machine-churned ice cream (often a bit lighter and softer). It’s a great option if you don’t have a machine.
Q: Why do recipes call for egg yolks in ice cream?
A: Egg yolks are a key component of traditional “custard-style” ice cream. They act as an emulsifier, helping to create a richer, smoother, and denser texture by preventing ice crystals from forming. They also contribute to the lovely golden color and contribute to the overall richness and mouthfeel.
Q: Can I reduce the sugar in my homemade ice cream recipe?
A: While you can slightly reduce sugar, be cautious. Sugar not only provides sweetness but also lowers the freezing point of the mixture, contributing to a softer, more scoopable texture. Reducing it too much can result in a harder, icier ice cream. If you want to cut down on sugar, try using natural sweeteners like ripe fruit or a touch of honey/maple syrup, but understand it may affect the texture.
Q: My ice cream base looks lumpy after cooking. What should I do?
A: Lumps usually mean your egg yolks scrambled slightly. This often happens if the dairy mixture was too hot when tempering, or if the custard was cooked at too high a heat. Always cook over low-medium heat, stir constantly, and never let it boil. If you do get lumps, simply strain the custard through a fine-mesh sieve immediately after cooking. This will catch any bits of cooked egg and ensure a silky smooth base.
References
- Culinary Creations Co.: Mastering Custard Bases for Desserts
- The Frozen Frontier: Advanced Churning Techniques
- Dessert Demystified: The Science of Sugar in Frozen Treats
- Baker Bytes: Your Guide to Brown Butter Perfection
Creating your own **homemade ice cream** is a journey of flavor, texture, and pure joy. We hope this guide inspires you to experiment, create, and share the delicious results with loved ones. Happy churning!
For more insights or collaboration opportunities, visit https://myrecipee.com